Pages

Tuesday, January 24, 2012

Aged Italian Fountain continues

Today was a very bust day in my studio, however, I was not able to get much more work done on the fountain and no work on the Italian House. What I was able to get done I will show you here.

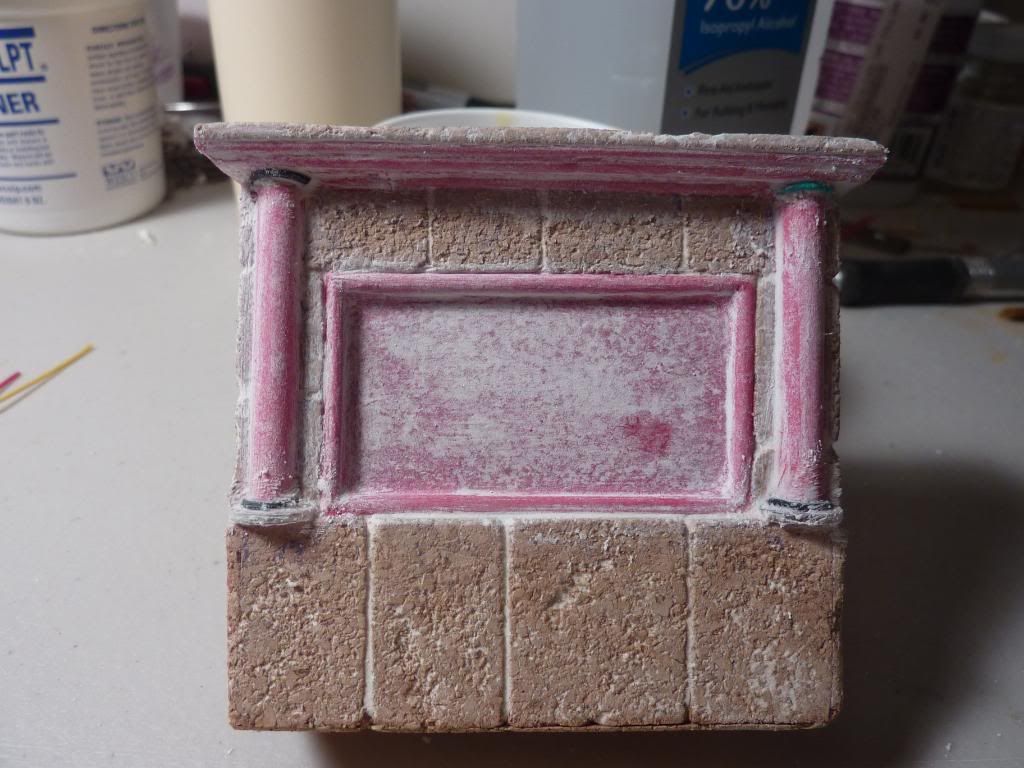
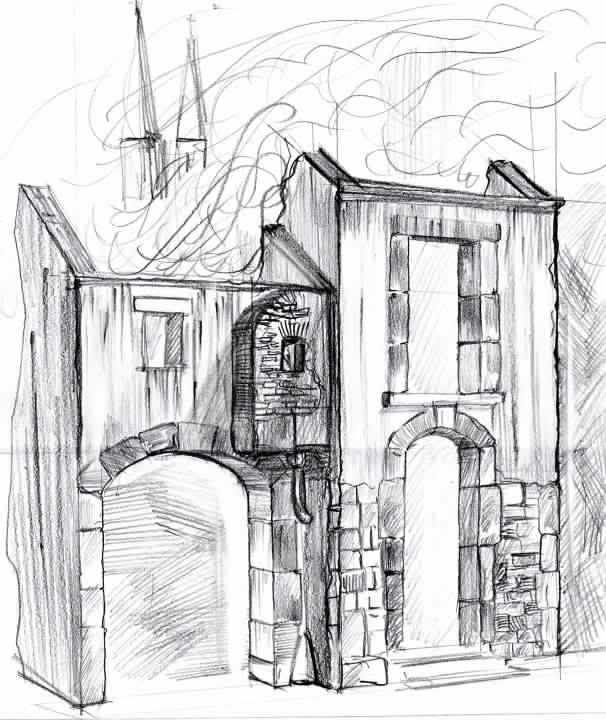
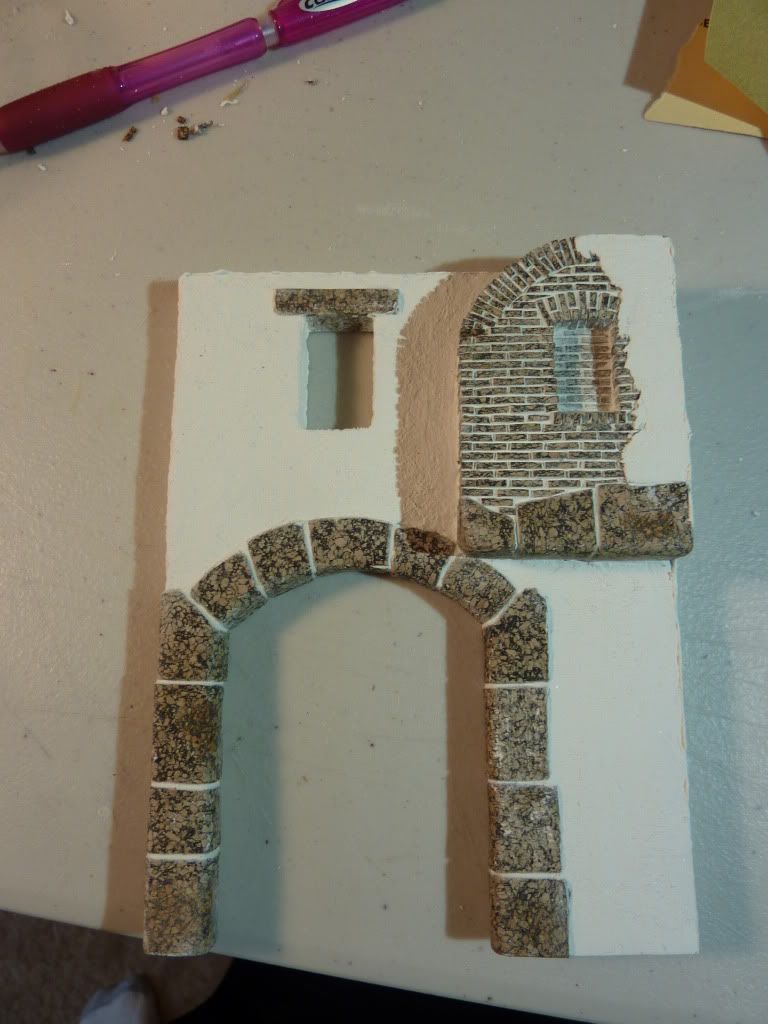
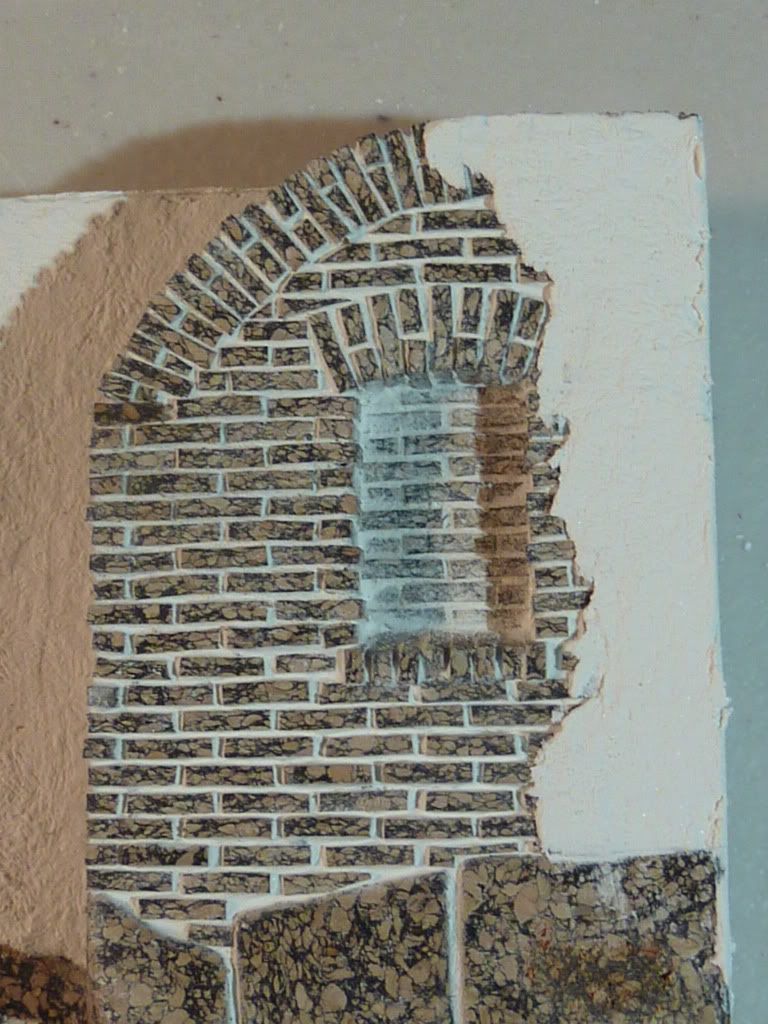
The work I was able to do was to make all the wood and plastic parts look like stone. It doesn't matter what colors you paint it, stone doesn't have wood grain and is not perfectly smooth. To transform these parts into stone I used some quality tissue paper and applied it to the model with diluted wood glue. After the paper was in place, I smoothed it out a bit with more diluted wood glue and a brush. I added tissue paper to the center as well to simulate a smoother stone or that perhaps it was covered with a smooth stucco. Once the paper was dry, I applied Spackle wall paste over the paper. This will help enhance the stone look. When the Spackle dried i sanded it smooth with fine grit sandpaper. All the pink areas are were I added the tissue paper. I also added an electronics wire to the bottom and top of the simulated pillars to enhance the look. 


Monday, January 23, 2012

Aged Italian Fountain

Today I took a break from working on the Italian house to work on a project I have had in my brain for quite some time now. I love the look of the old Italian water fountains and have decided to build one. This fountain is based on both real photographs found online as well as design from my mind. Here is the sketch I drew to rough scale using a 1/35 scale figure as reference. 


Sunday, January 22, 2012

AK Interactive Review

I have been in contact with AK Interactive USA today; and am pleased to announce that I will soon have products to review for you all. I look forward to this as I have always been interested in their products.

A big thank you goes out to AK Interactive for the opportunity!

Thursday, January 19, 2012

Scale Hardware

Picture


I have just received my order of simulated hex bolts from the company called Scale Hardware. The bolts I received were 0.5 mm bolt heads turned from brass. I must say these are the best I have ever seen and live up to their name as the worlds finest scale fasteners! These simulated bolts will give any modeler in any scale superb bolt details far superior to any resin or photo etch rivals on the market today. I must warn you though, you will need some magnifiers and a good set of tweezers to work with these, also watch out for the carpet monster, I lost a couple to it while doing this review. The price is a bit spendy, 25 pcs. for $9 - $10 plus shipping of $3, but for the die hard detail modeler this is the way to go.

They have a wide rang of scale hardware including real working scale nuts and bolts for the truly dedicated modeler. Click the logo above to go to Scale Hardware's website.

Picture

Picture
Picture
Picture


Building the floor.

Made some small progress over the last few days. Life has been getting in the way a bit, so the progress slowed.

I was able to get the first levels floor done. I built it out of bass wood with the help of a couple jigs to hols everything secure while I built it.

Once the assembly was complete, I decided to add some plumbing to get more visual interest. I cut more scrap sprue and drilled it out again. I attached this to the underside of the floor joist with CA glue.


Wednesday, January 18, 2012

Ok, Im figuring it out.

So like I said I am new to this whole blog thing, so you may notice that things seem to keep changing around here. This should stop soon as I think I may have actually figured out how to do this LOL.

You can follow specific build logs in the "build log" menu on the left. this will make updating the build much easier for me and for you, the reader, looking for specific build log.


Sorry for the mess, happy modeling!

Italian home scratch build.

Hello all, it has been some time since I could build anything for me. I have been crazy busy over the last few months and needed something to get my mind off of everything and enjoy building something that will go on my shelf.

So I am working on the building for this dio now, have no idea what vehicles or figures will be in it as of yet. The design of the building came from Carlos (Blockhaus) so the credit goes to him for the design and I hope that my building skills are worthy of bearing his name on the design :-\

I will be building this out of 3 kinds of cork some of which came all the way from Spain to be placed on this building. Im using three kinds because they all very in thickness to give better visual interest.

Here is the original art work drawn by Carlos:


So I started cutting the foam core to the right shape and size as well as chopping endless amounts of cork for the stones and bricks. This was my first attempt at working with cork for many years and was satisfied with how this was coming out, that was until I showed Carlos and got schooled on my errors ;)

Tuesday, January 10, 2012

Welcome to my diorama building Blog!

Welcome one and all, this is my first blog so bare with me as I figure this all out. I will post some things on the home page here as I build. I will be creating pages for different projects that I will be working on and keep those up to date as best I can.


I hope that you all can follow along with me and learn something new and how scratch building your diorama structures can enhance both your diorama and your building skills. It will also show you materials for diorama building that can be easily obtained.
I will be scratch building mostly out of cork and plastic, but I will also utilize plaster scribing and a product known as Balsa Foam as well as other materials. I will blog the steps i use for each item to create your own unique buildings for your dioramas.

Happy scratch building!