So today I was able to put in a little time on the Italian Fountain. I worked a bit on the fountain its self and then the major work was put in on the fountain base.
To start with, I needed something to support the small overhang from the pillar base on the sides. At first I was going to continue the pillar all the way down, but I thought that would take away from the element at the top. So in scavenging around my studio I found the perfect piece to use.

The art of scale diorama building; with a critical eye of scale, texture, and composition.
Sunday, February 19, 2012

Sunday, February 5, 2012
AK interactive Pigment Review

Today I was able to sit down and put the AK pigments to the test. I will be demonstrating these pigments to create the ground effects of a diorama. In this review I will be focusing on three pigments; AK-081 Dark Earth, AK-042 European Earth, and AK-041 North Africa Dust.
I will be using celluclay for the base and will add the pigments to it in order to get a nice color that goes all the way through. This will help in the event the ground work gets chipped, it will not expose a bright white color. This technique can also be used with plaster if that is your medium of choice when it comes to groundwork.
The first thing I noticed about these pigments was the very fine grinding. There are no clumps and when rubbed between my fingers it gave a nice smooth covering of color. This is a very good sign that it will be easy to add the pigments to figures and vehicles to blend them into the base.
Tuesday, January 24, 2012
Aged Italian Fountain continues
Today was a very bust day in my studio, however, I was not able to get much more work done on the fountain and no work on the Italian House. What I was able to get done I will show you here.
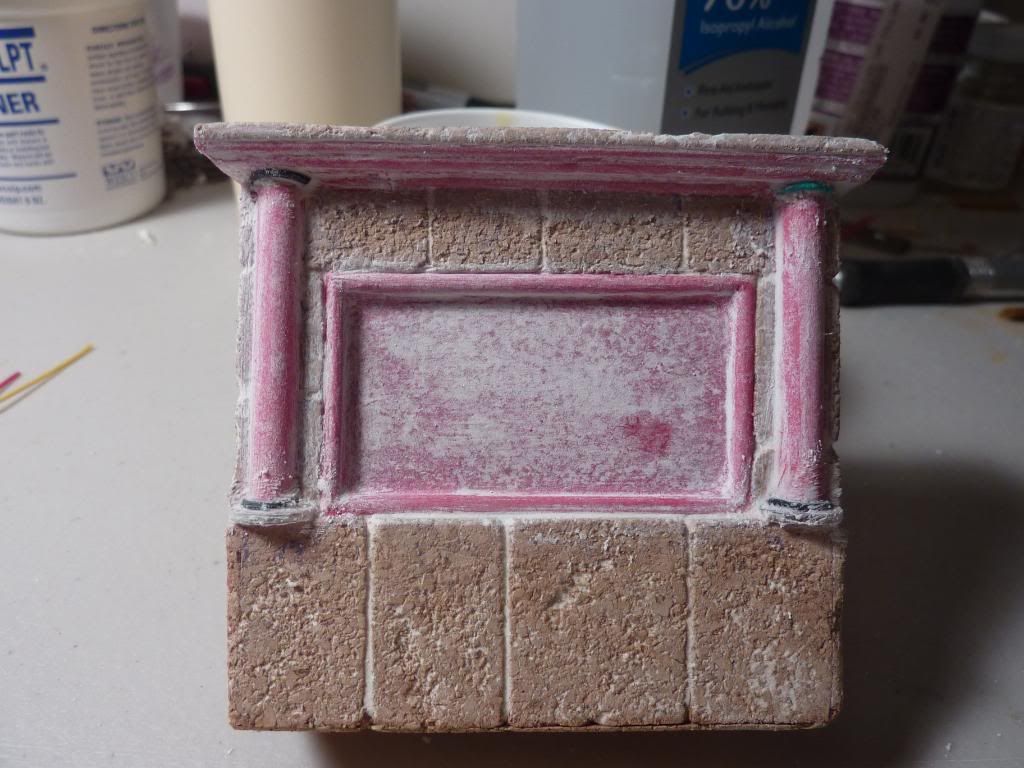
The work I was able to do was to make all the wood and plastic parts look like stone. It doesn't matter what colors you paint it, stone doesn't have wood grain and is not perfectly smooth. To transform these parts into stone I used some quality tissue paper and applied it to the model with diluted wood glue. After the paper was in place, I smoothed it out a bit with more diluted wood glue and a brush. I added tissue paper to the center as well to simulate a smoother stone or that perhaps it was covered with a smooth stucco. Once the paper was dry, I applied Spackle wall paste over the paper. This will help enhance the stone look. When the Spackle dried i sanded it smooth with fine grit sandpaper. All the pink areas are were I added the tissue paper. I also added an electronics wire to the bottom and top of the simulated pillars to enhance the look.

The work I was able to do was to make all the wood and plastic parts look like stone. It doesn't matter what colors you paint it, stone doesn't have wood grain and is not perfectly smooth. To transform these parts into stone I used some quality tissue paper and applied it to the model with diluted wood glue. After the paper was in place, I smoothed it out a bit with more diluted wood glue and a brush. I added tissue paper to the center as well to simulate a smoother stone or that perhaps it was covered with a smooth stucco. Once the paper was dry, I applied Spackle wall paste over the paper. This will help enhance the stone look. When the Spackle dried i sanded it smooth with fine grit sandpaper. All the pink areas are were I added the tissue paper. I also added an electronics wire to the bottom and top of the simulated pillars to enhance the look.
Monday, January 23, 2012
Aged Italian Fountain
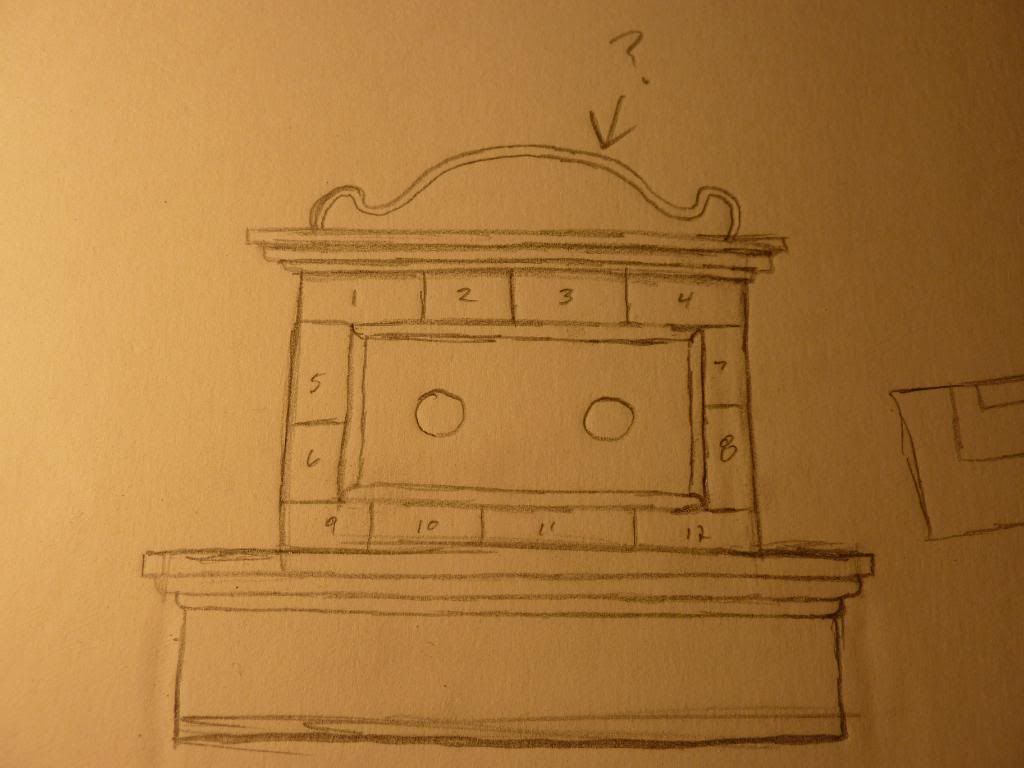
Today I took a break from working on the Italian house to work on a project I have had in my brain for quite some time now. I love the look of the old Italian water fountains and have decided to build one. This fountain is based on both real photographs found online as well as design from my mind. Here is the sketch I drew to rough scale using a 1/35 scale figure as reference.
Sunday, January 22, 2012
AK Interactive Review
I have been in contact with AK Interactive USA today; and am pleased to announce that I will soon have products to review for you all. I look forward to this as I have always been interested in their products.
A big thank you goes out to AK Interactive for the opportunity!
A big thank you goes out to AK Interactive for the opportunity!
Thursday, January 19, 2012
Scale Hardware

I have just received my order of simulated hex bolts from the company called Scale Hardware. The bolts I received were 0.5 mm bolt heads turned from brass. I must say these are the best I have ever seen and live up to their name as the worlds finest scale fasteners! These simulated bolts will give any modeler in any scale superb bolt details far superior to any resin or photo etch rivals on the market today. I must warn you though, you will need some magnifiers and a good set of tweezers to work with these, also watch out for the carpet monster, I lost a couple to it while doing this review. The price is a bit spendy, 25 pcs. for $9 - $10 plus shipping of $3, but for the die hard detail modeler this is the way to go.
They have a wide rang of scale hardware including real working scale nuts and bolts for the truly dedicated modeler. Click the logo above to go to Scale Hardware's website.


Building the floor.
Made some small progress over the last few days. Life has been getting in the way a bit, so the progress slowed.
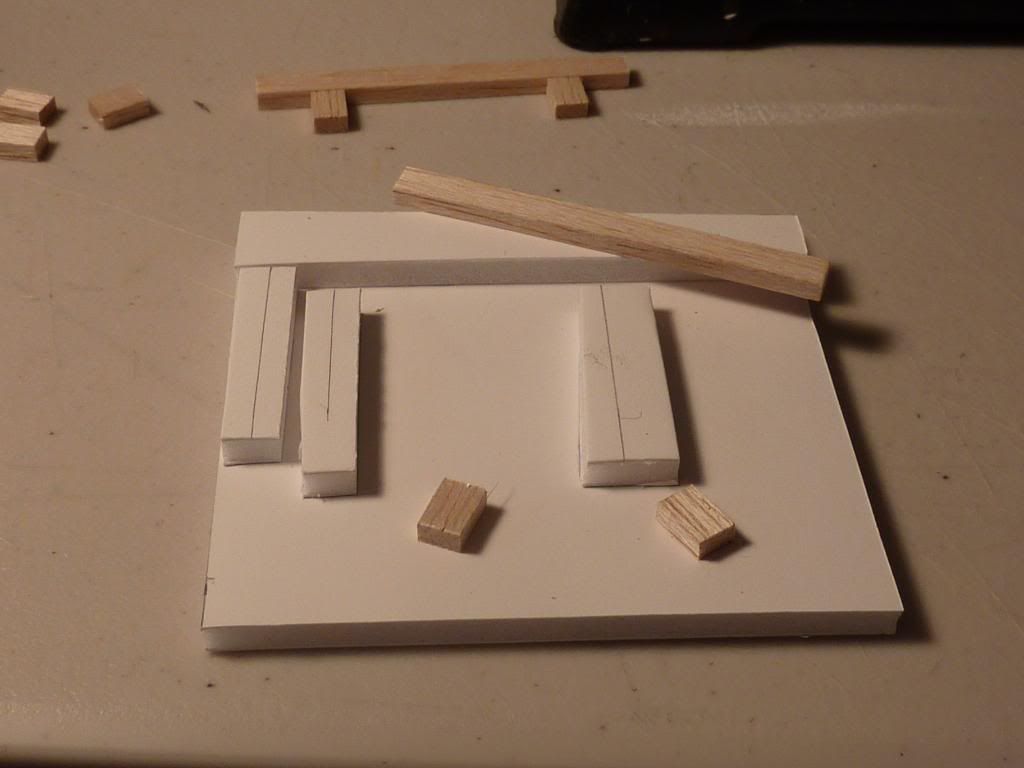
I was able to get the first levels floor done. I built it out of bass wood with the help of a couple jigs to hols everything secure while I built it.
Once the assembly was complete, I decided to add some plumbing to get more visual interest. I cut more scrap sprue and drilled it out again. I attached this to the underside of the floor joist with CA glue.

I was able to get the first levels floor done. I built it out of bass wood with the help of a couple jigs to hols everything secure while I built it.
Once the assembly was complete, I decided to add some plumbing to get more visual interest. I cut more scrap sprue and drilled it out again. I attached this to the underside of the floor joist with CA glue.
Subscribe to:
Posts (Atom)