
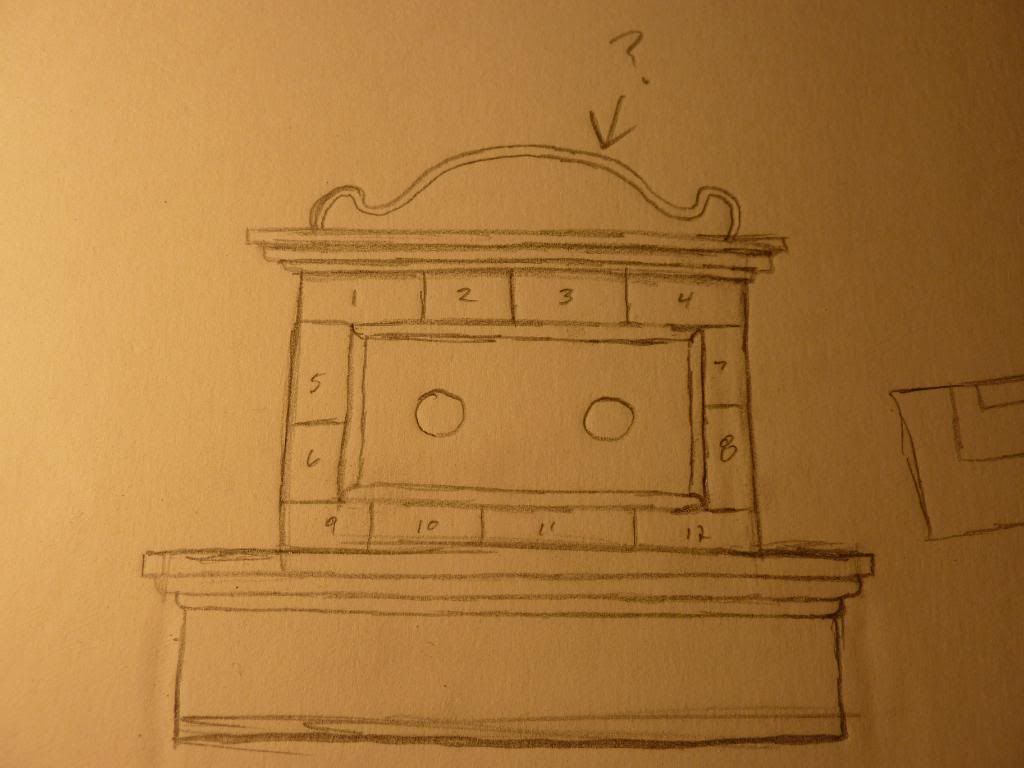
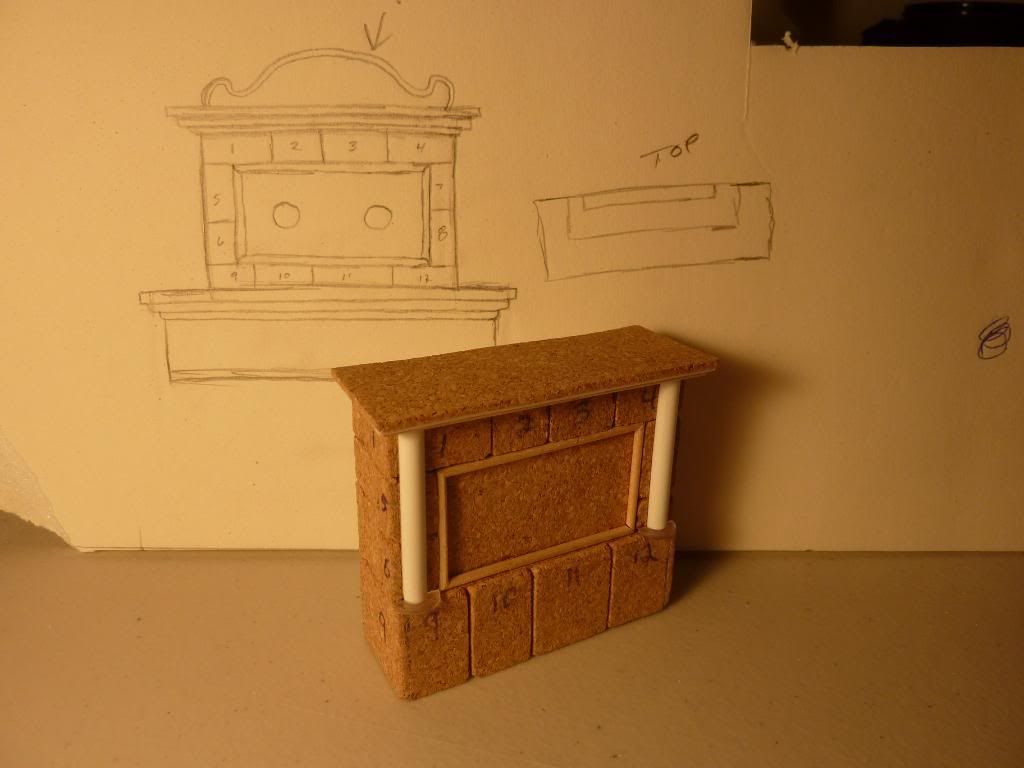
Today I took a break from working on the Italian house to work on a project I have had in my brain for quite some time now. I love the look of the old Italian water fountains and have decided to build one. This fountain is based on both real photographs found online as well as design from my mind. Here is the sketch I drew to rough scale using a 1/35 scale figure as reference.
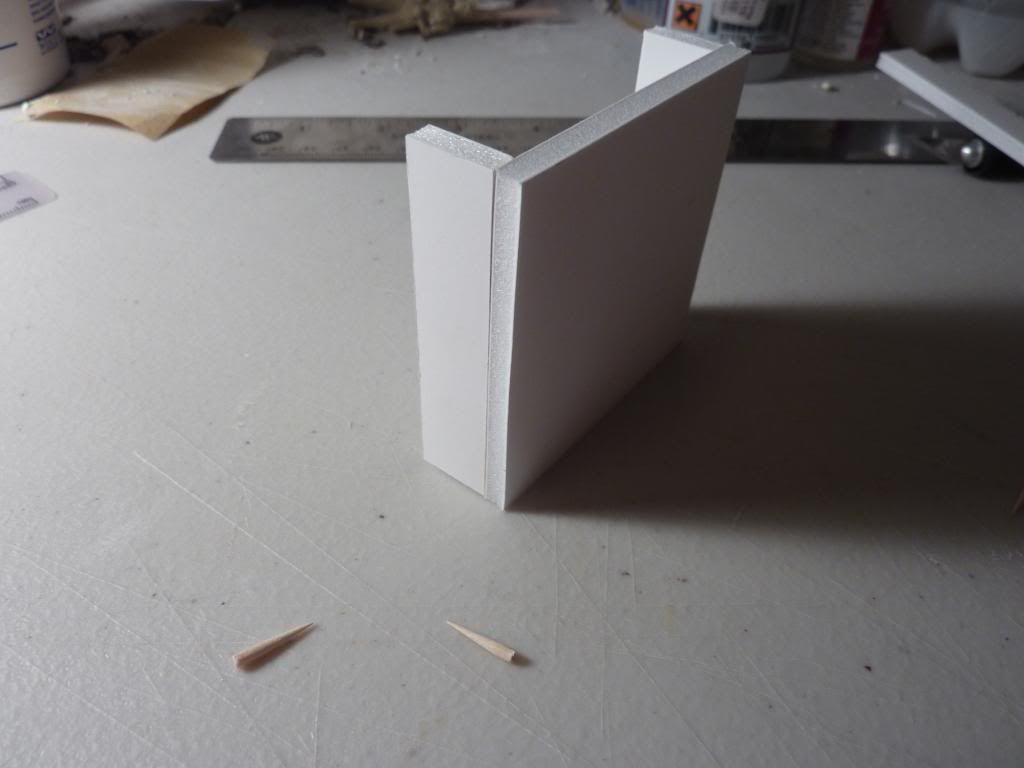
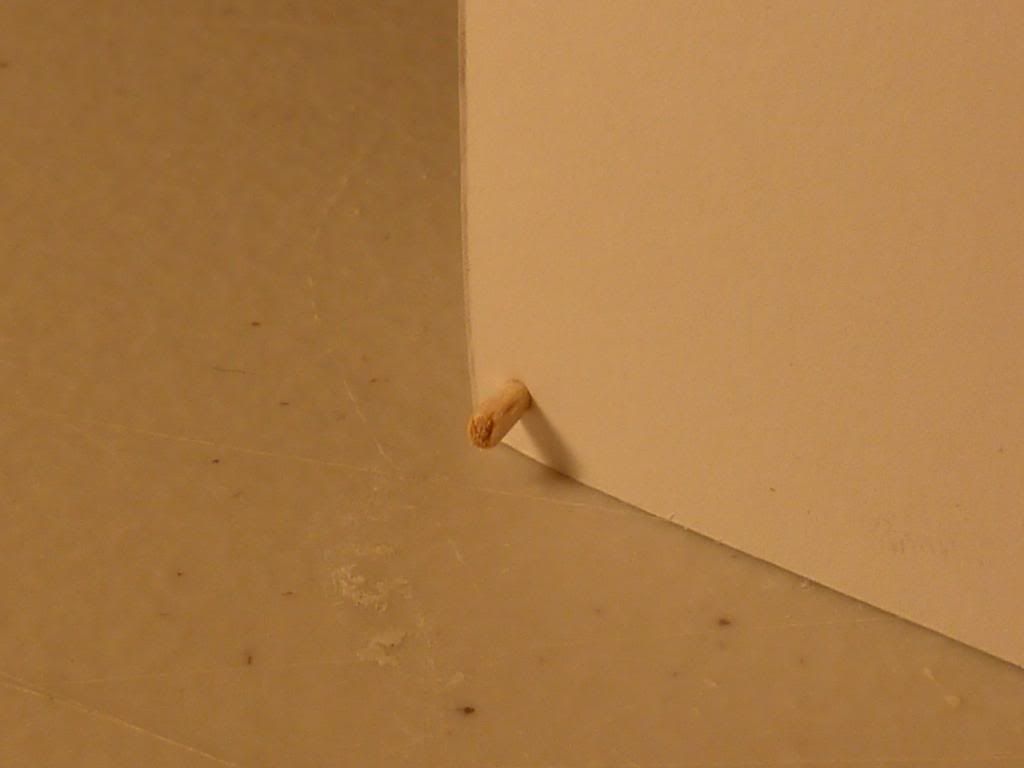
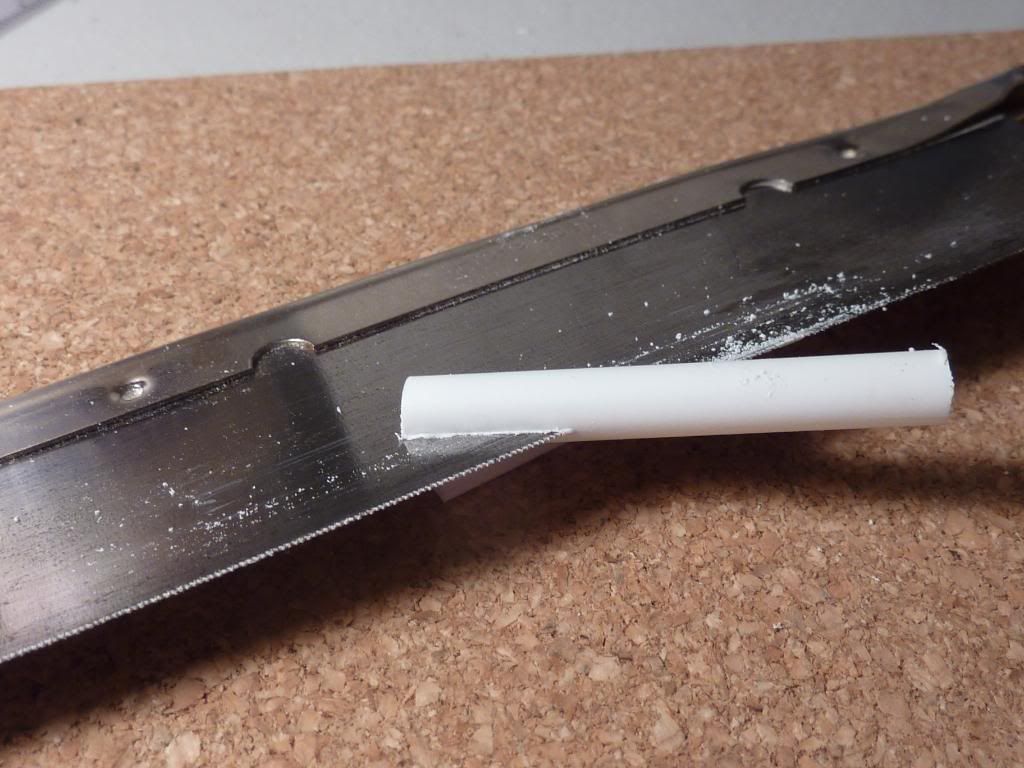
To start this project, I took measurements from the drawing and constructed the base of the fountain out of foam core board. To help strengthen the sub-assembly, I inserted tooth picks into the corners of the face and into the side walls. Now comes the part of laminating cork onto the sub-assembly. I measured and cut the cork face first, followed by the sides. At this time I also cut a plastic tube in half for a design element that I will put in place at a later time.
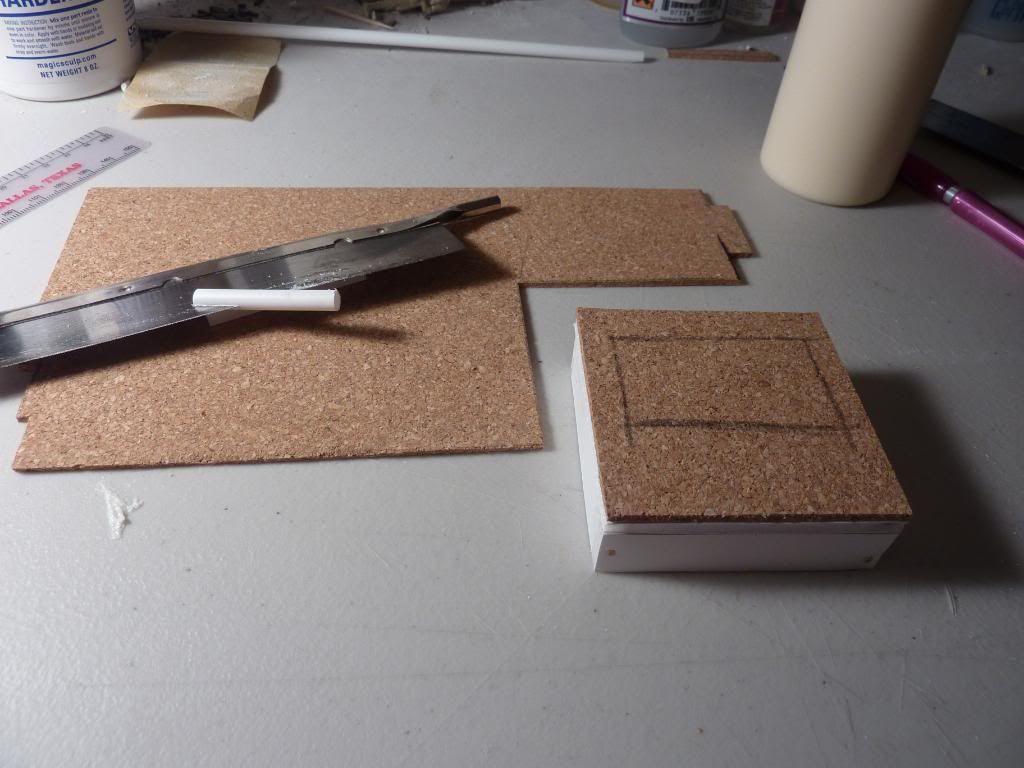
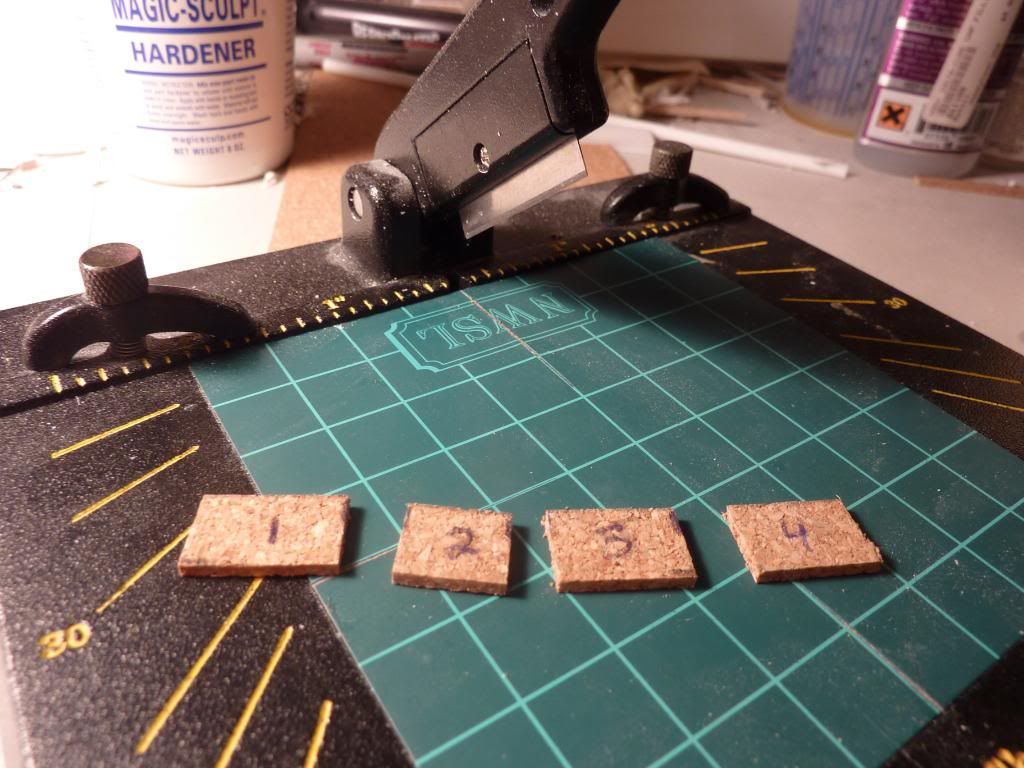
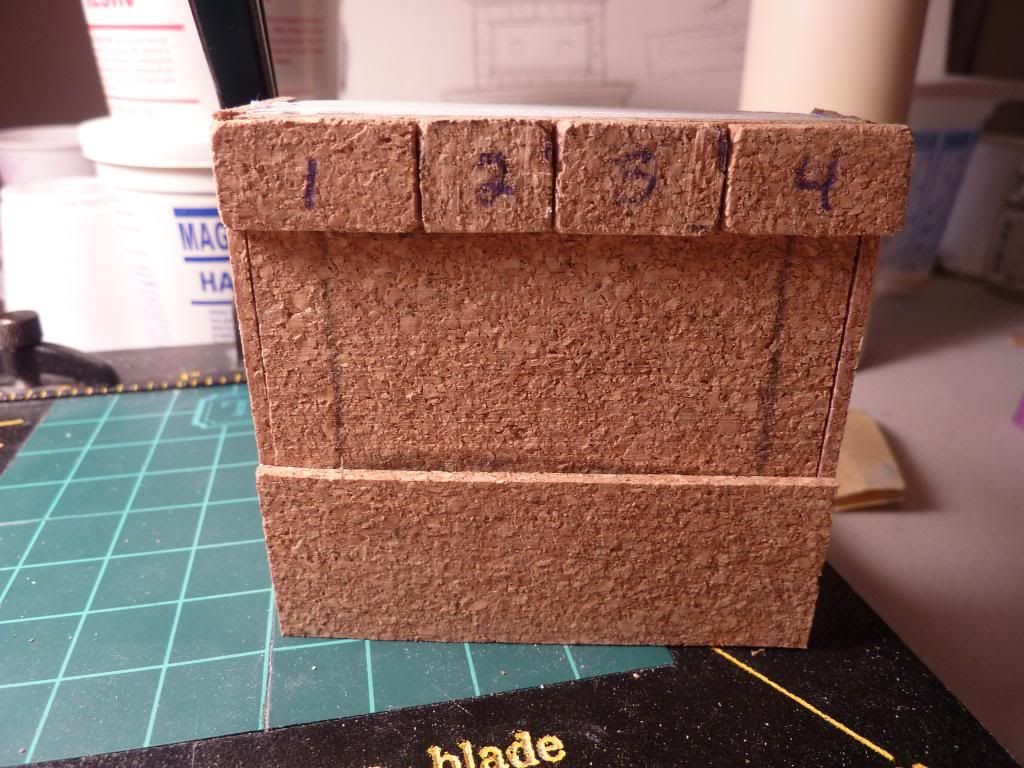
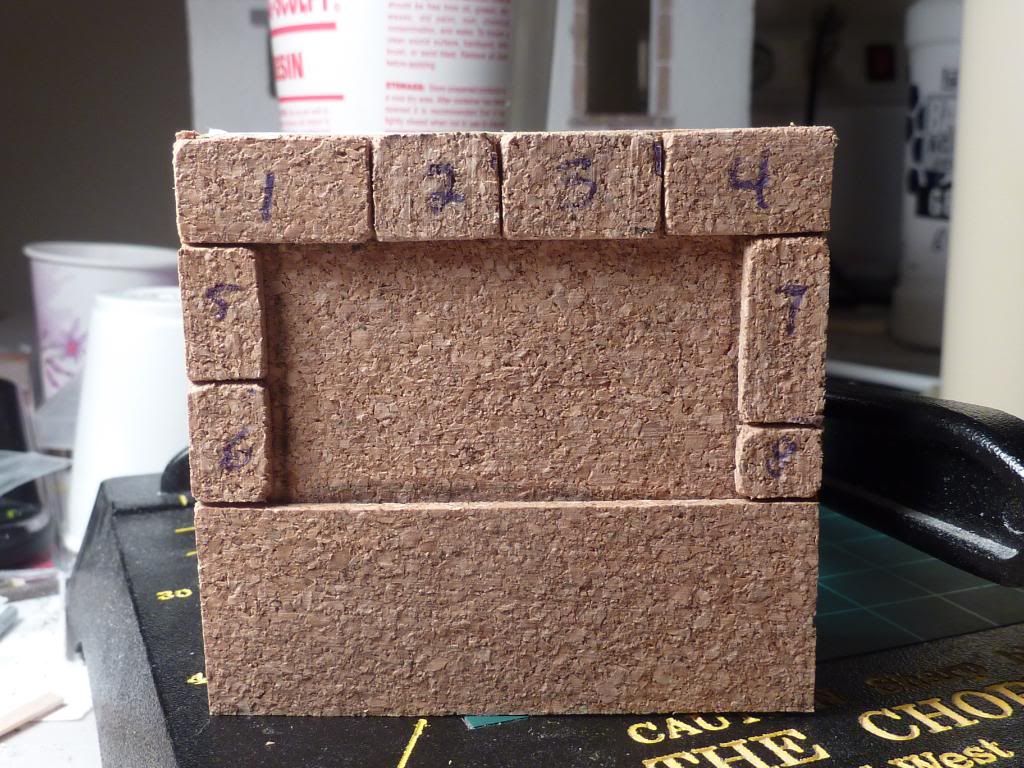
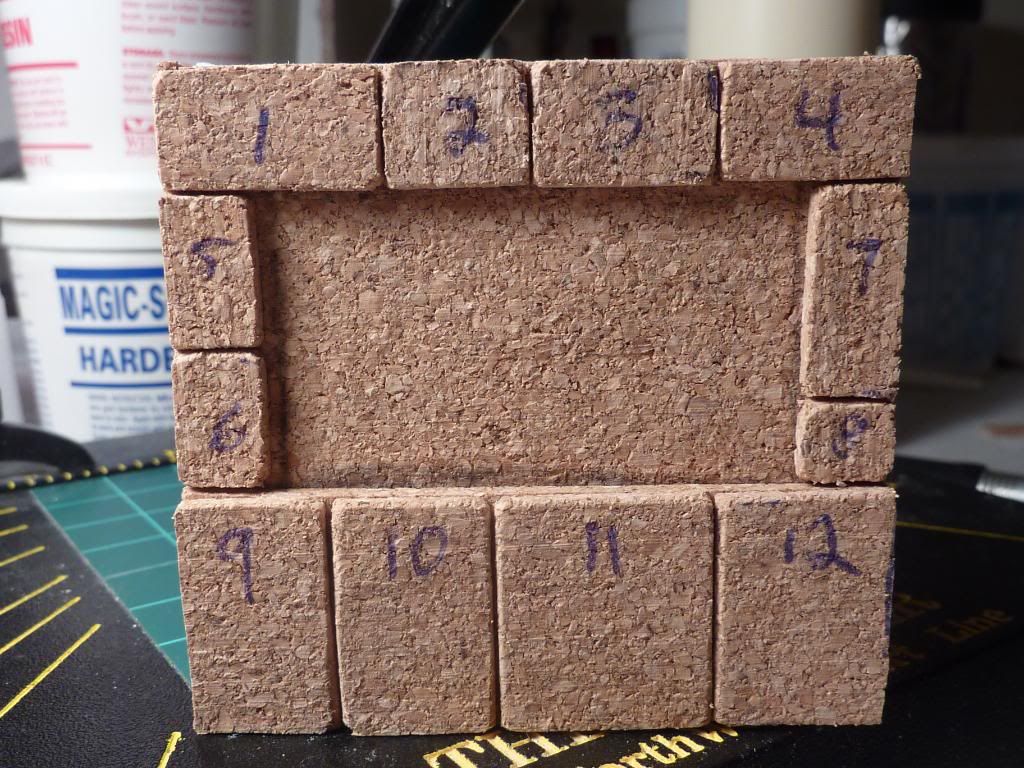
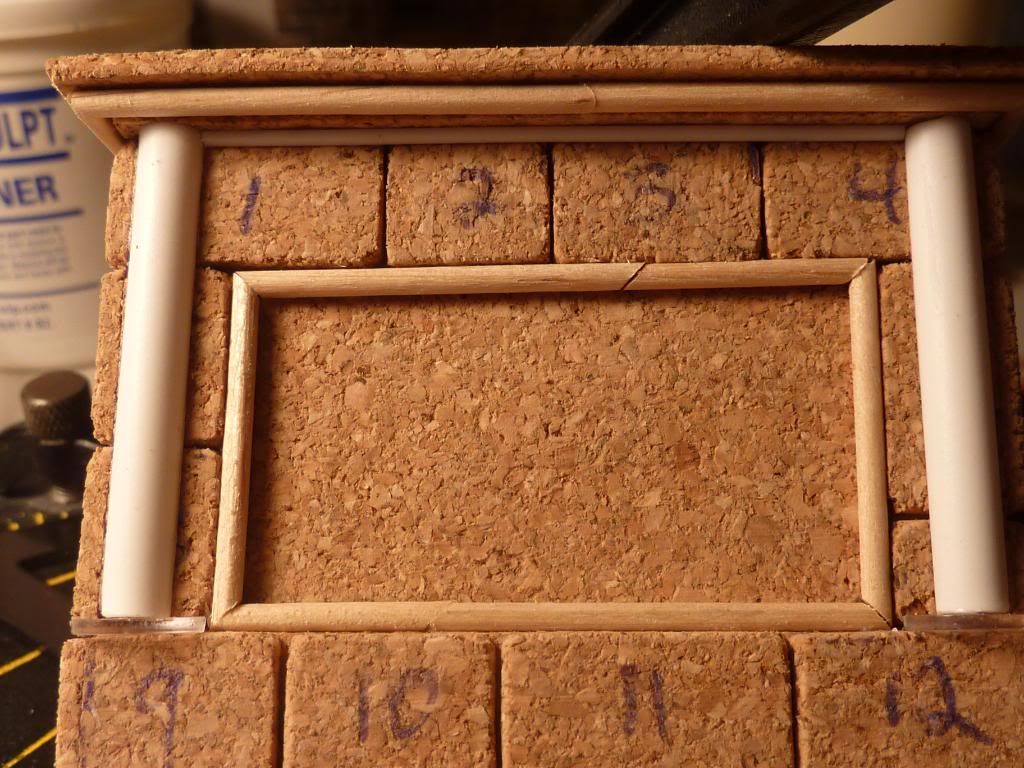
In the drawing you will notice I have numbered all the stones of the front of the fountain. I did this for this next step to help keep all the stones in the right places. I measured the size of the upper stones in the drawing and cut a strip of cork to that size. Once the strip was cut, I used the drawing to mark the sizes of stones, making sure to number the stones in order on the cork.
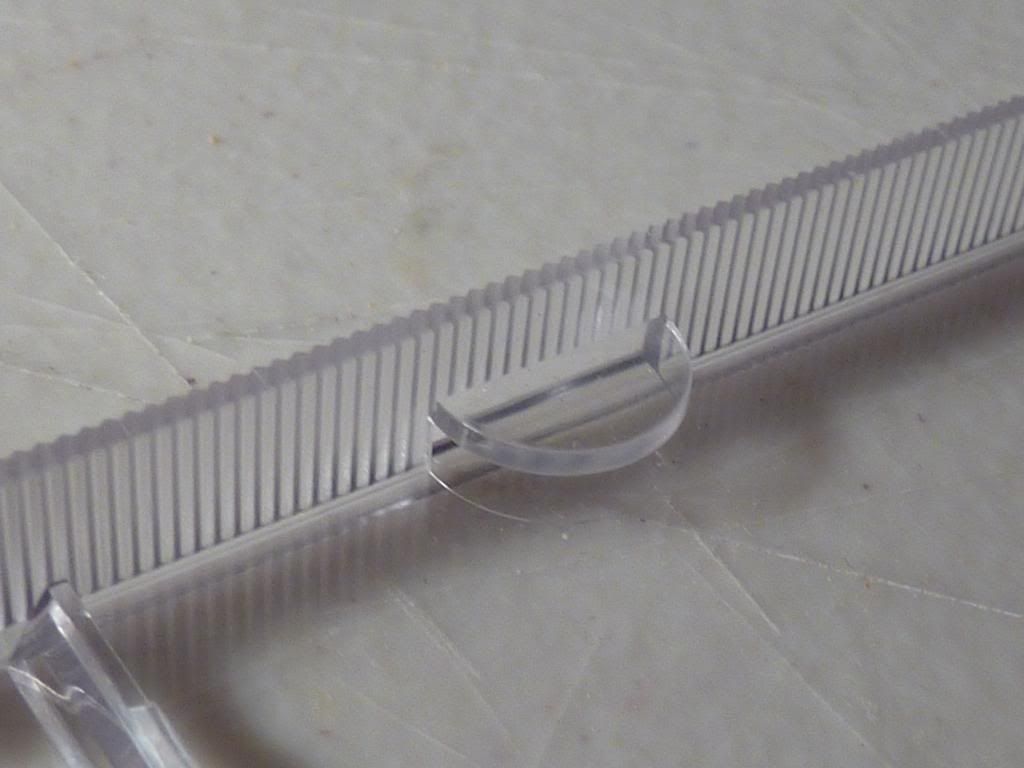
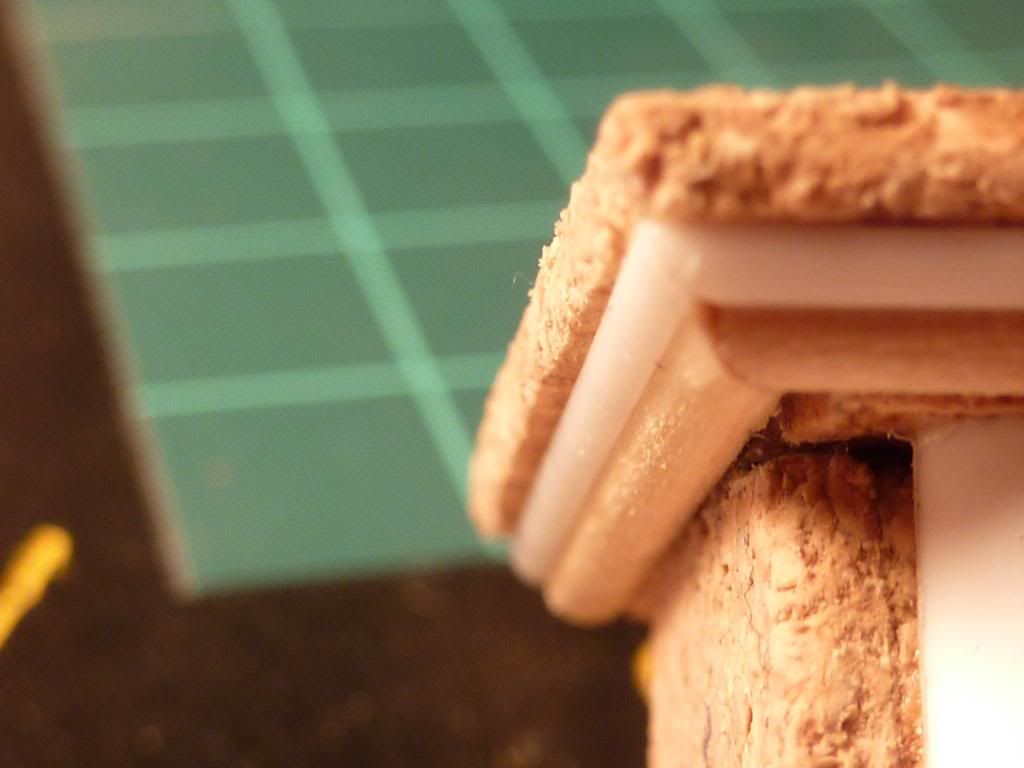
One thing to always consider when scratch building architecture, is where you can acquire premade architectural elements. In this case I needed a half rounded ledge with a decent thickness. I began to look around what I had in my spares box with no success; and then it hit me! During my many conversations with Carlos (Blockhaus) I remembered him telling me about using CD cases in some of his work. As it turns out, every CD case has 2 or 4 of these:
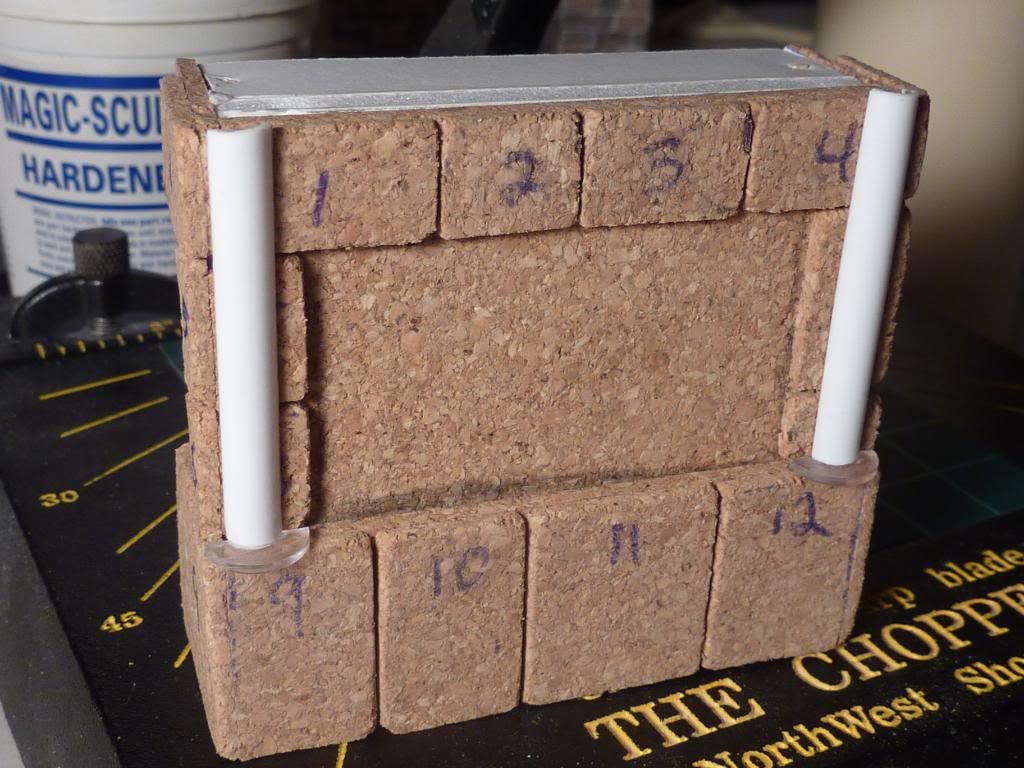
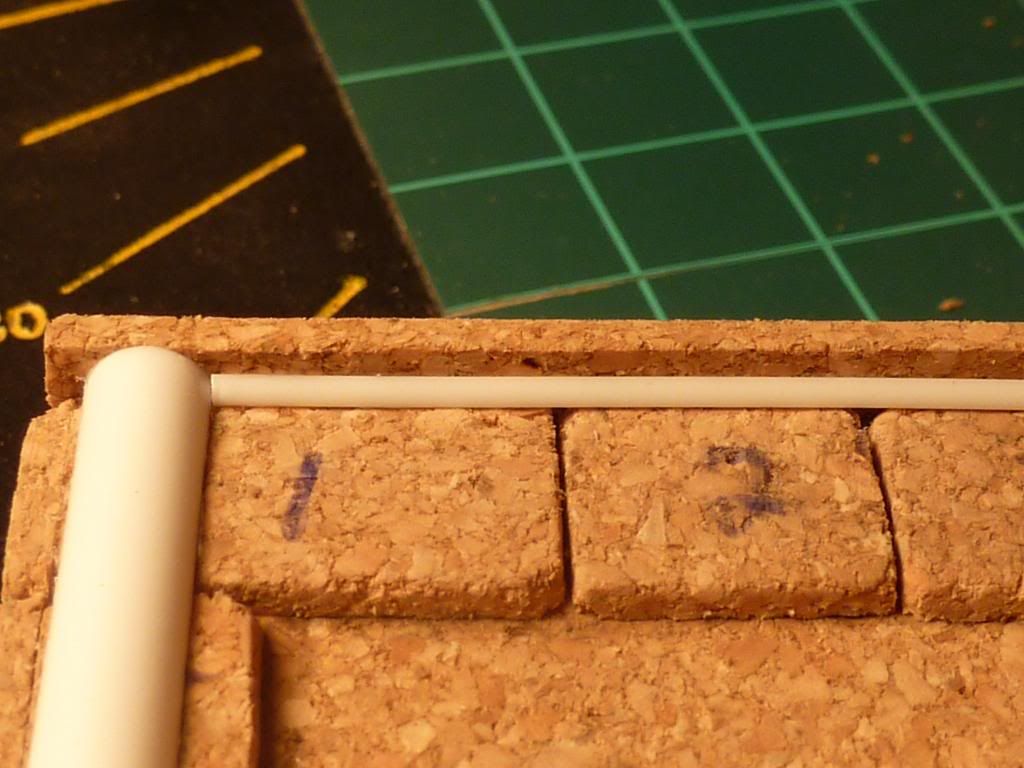
I carefully cut the tabs off of the case and installed them on the model. This step is where the half tube comes in from earlier; I glued these up the side of the fountain on top of the CD case tabs. After these were installed, I cut the beginning of what will be the top of the fountain. I glued this to the top of the fountain and glued in a quarter round rod under the lip between the two decorative pillars.


At this point it was time to finish off the top of the fountain. To do this I cut a piece of cork that is a scale six inches larger on three sides than the last piece I installed. Under this lip I glued in cut toothpicks to give the first of the crown profile. I also glued in toothpicks around the fountain face where the fountain spouts will be. The small gap you see in the upper toothpicks will be filled with putty later; I just ran out of the longer ones and had to join two of them together to cover the length. To finish off the crown edge of the top cap of the fountain, I glued in more quarter round between the toothpicks and the top piece of fountain.
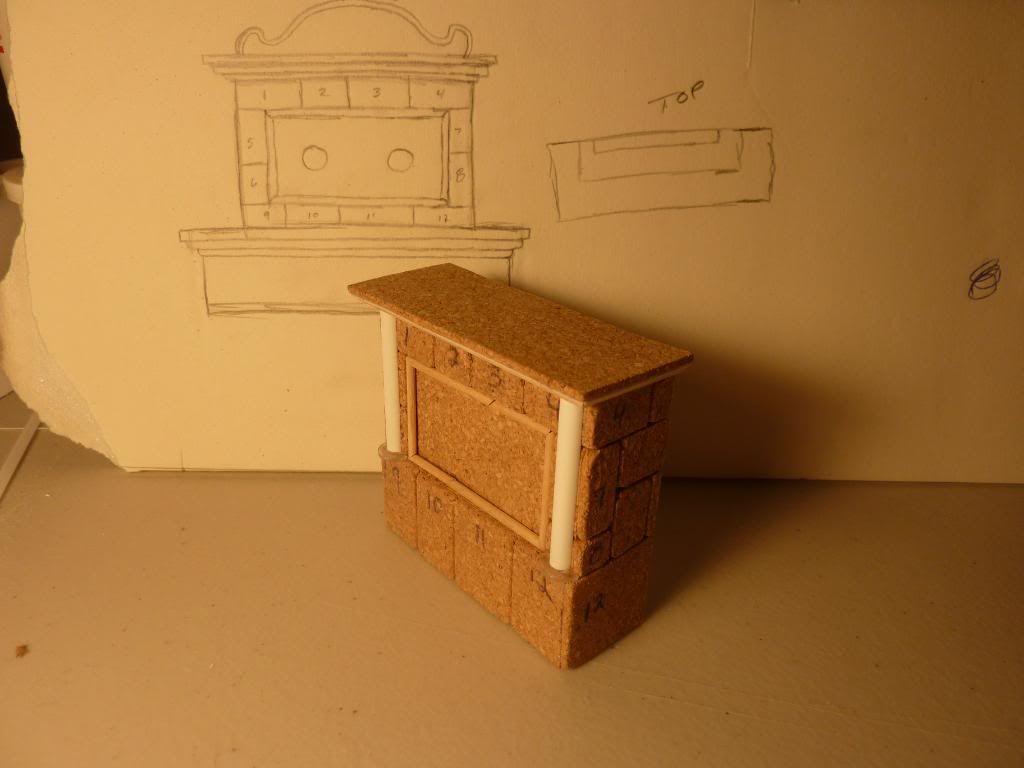
Here is the final look of the main part of the fountain. You can see that using a scale drawing can help you when it comes to the final product. However, you don’t always have to follow the drawing. Feel free to make changes on the fly as you are building, if you think it will look good than do it. This is how I added the pillars, as the original design did not contain them.
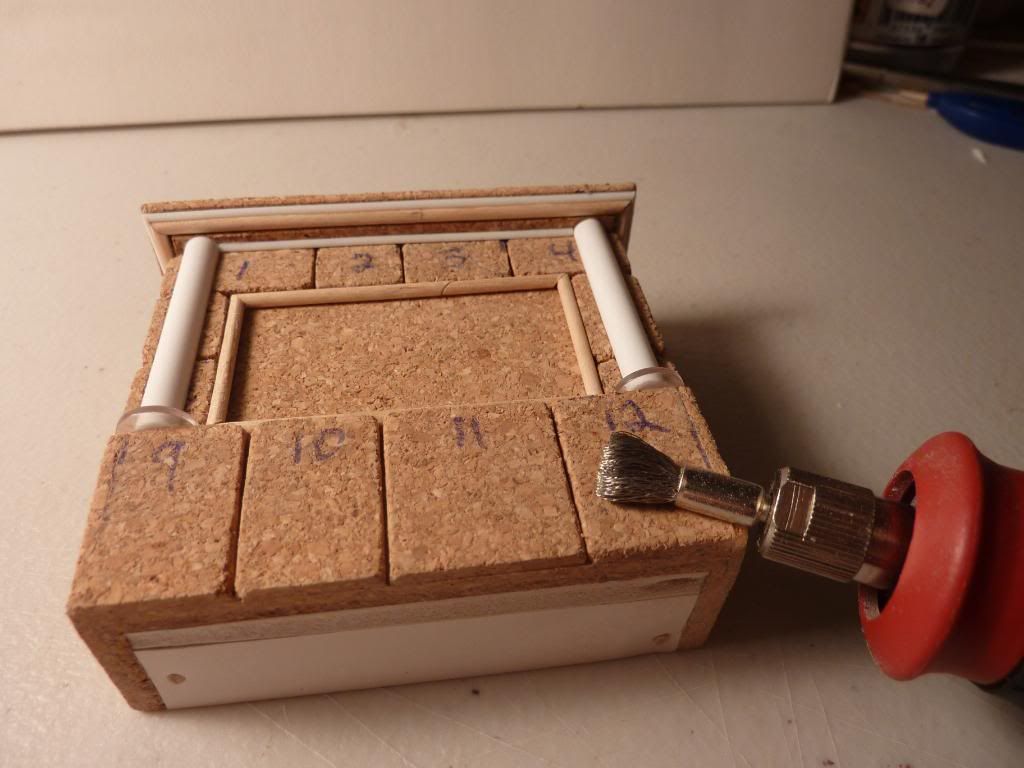
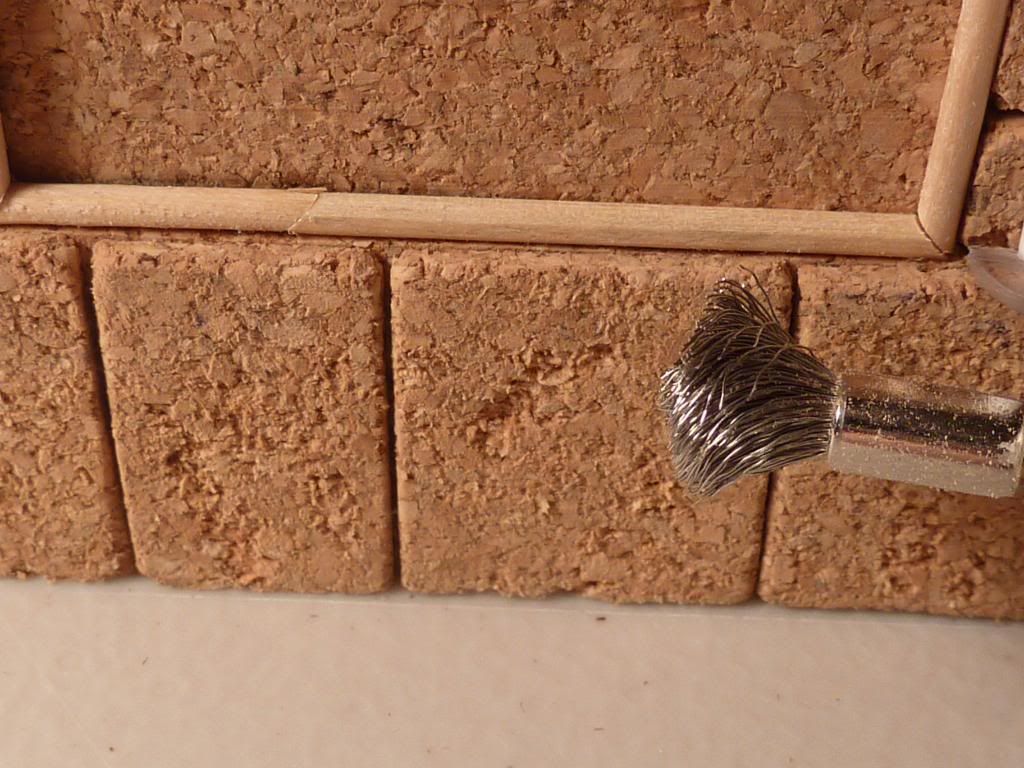
To finish off this part of the fountain, I decided that I wanted an aged stone look; not just the look of a new fountain. To make the effect of weathered stone, I chucked up a wire brush into my dremel tool and at slow to medium speed, ran the wire brush over the cork. This breaks up the surface of the smooth cork but makes the cork a little too rough. In order to tone this look down, I took a piece of 350 grit sandpaper to smooth it out a bit. This is the final look of the stone.
:) love it very nice work Chris,that cork stone work looks great, nice attention to detail love the textures and shapes you have got in there.
ReplyDeleteThanks Andy, this project has been on the "to do list" for many years. Don't know why I didn't do it sooner.
DeleteChris your builds are looking great! Looks like you've really understand how Blockhaus builds his and are taking it to a different level. Now when you start casting these let me know.......
ReplyDelete