
Today I sat down and made a review or the Slate tile mold from Diorama Debris; a UK based company that produces many architectural molds for many scales, but their main focus as of now is the 1:35 scale diorama builder.
The first thing I would like to say about these is, WOW these are amazing molds! I was completely blown away at the detail and precision mold making skills shown by Diorama Debris! The molds are flawless with no air bubbles like other molds on the market.
OK, now for the review and pics!

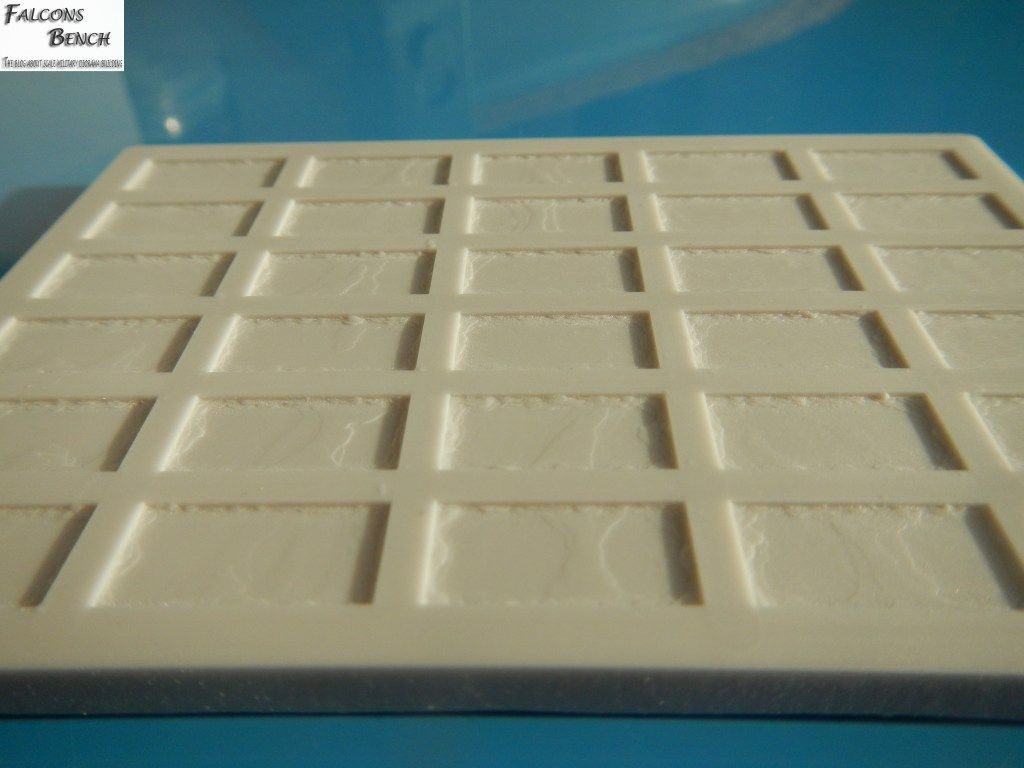
Here you can start to see the detail of the mold:

And here is a close up of the detail, AMAZING!
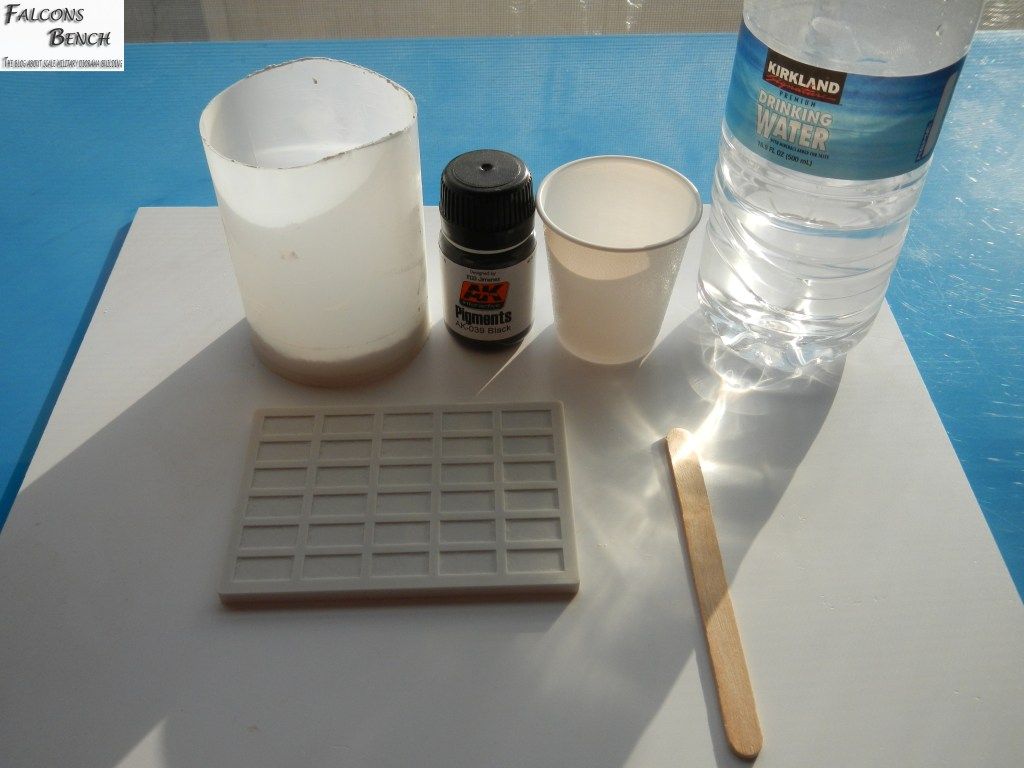
To start off using this mold, I have gathered the needed supplies: Dental stone plaster, AK Interactive - Black Pigment, plastic mixing cup, and clean water. Not pictured is a metal straight edge and the mold release that I use. The mold release I picked up at a local casting supply store and is intended to be used for plaster casting. When selecting your plaster, make sure it has at least a 1700 psi breaking point. The cheaper Plaster of Paris might not be strong enough for these castings as the are very thin.
When mixing your selected plaster, never add water to the plaster. First add your water, then slowly add your plaster and watch as it soaks up the water, you want a paste looking mixture before you start stirring. BUT, before adding the plaster, if you want to pre-color the mixture, use pigments to do so. Add your pigment color to the water and stir together, follow this with your plaster.
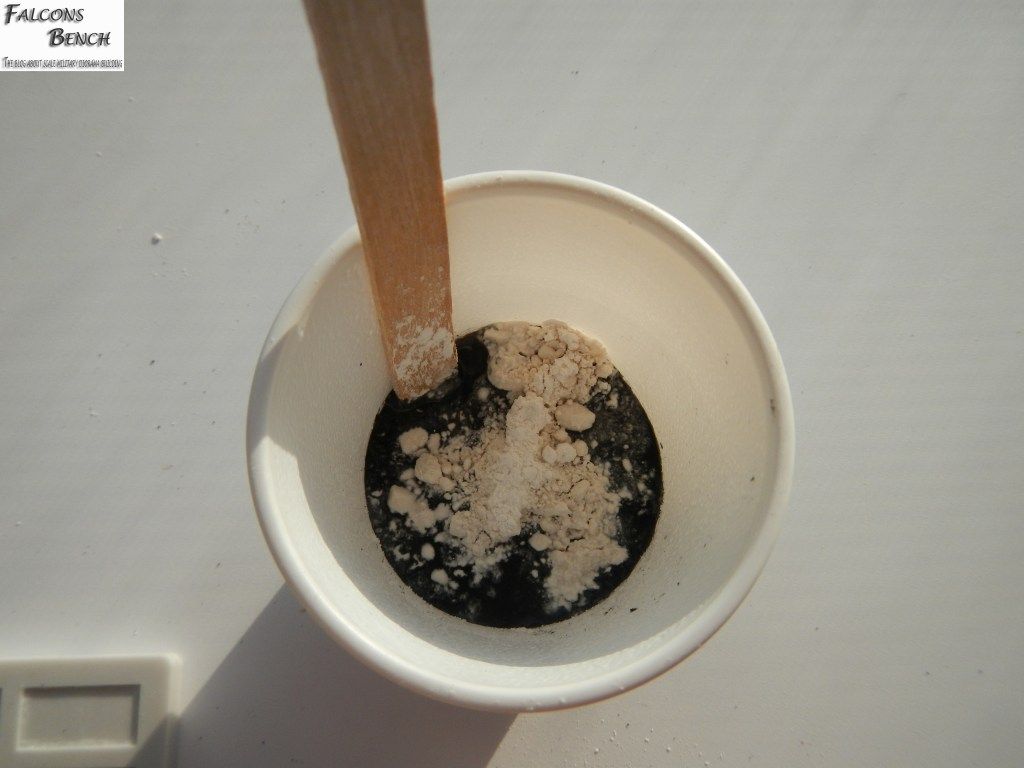
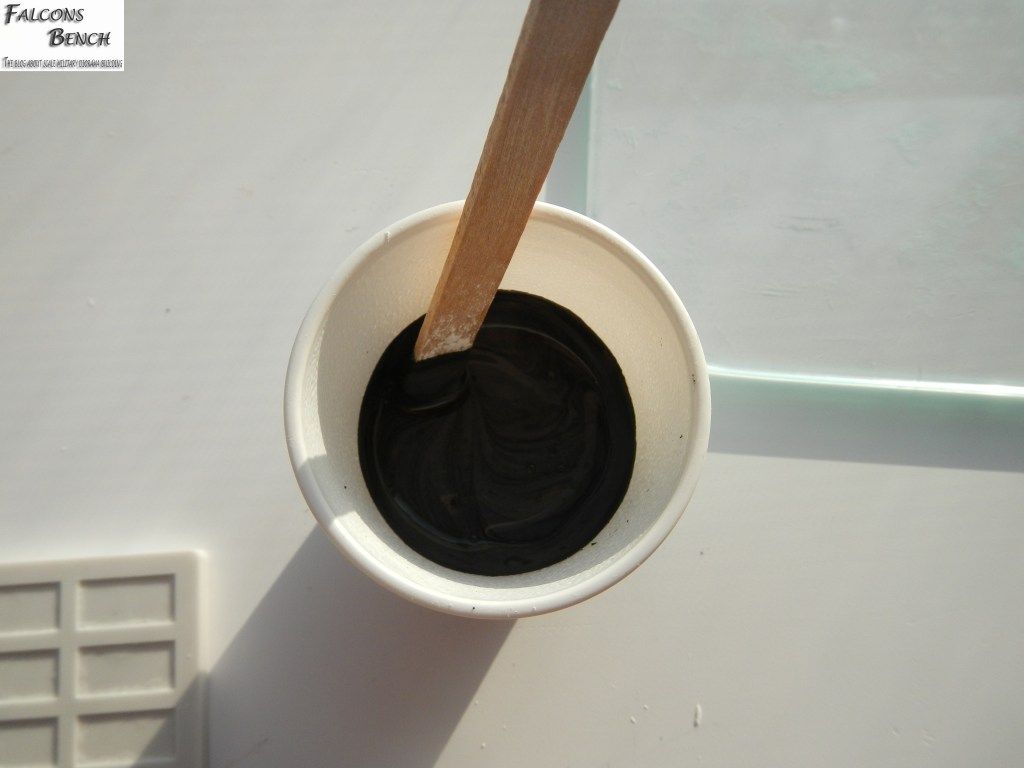
Once all of the water is soaked into the plaster and you are left with a paste looking texture; stir the plaster. For the slate tiles I stirred the plaster just to the point of even color with just a hint of darker swirls of color. This should give the slate the natural color mix.
The next step is to use a small brush to work the mix into all of the corners. This will help eliminate air pockets and to get a full cast. Move quickly and efficiently as the plaster seems to cure a bit faster with the addition of pigments. As you go, pause a moment to tap the mold to help bring out any trapped air and to make sure the plaster gets into all of the texture.
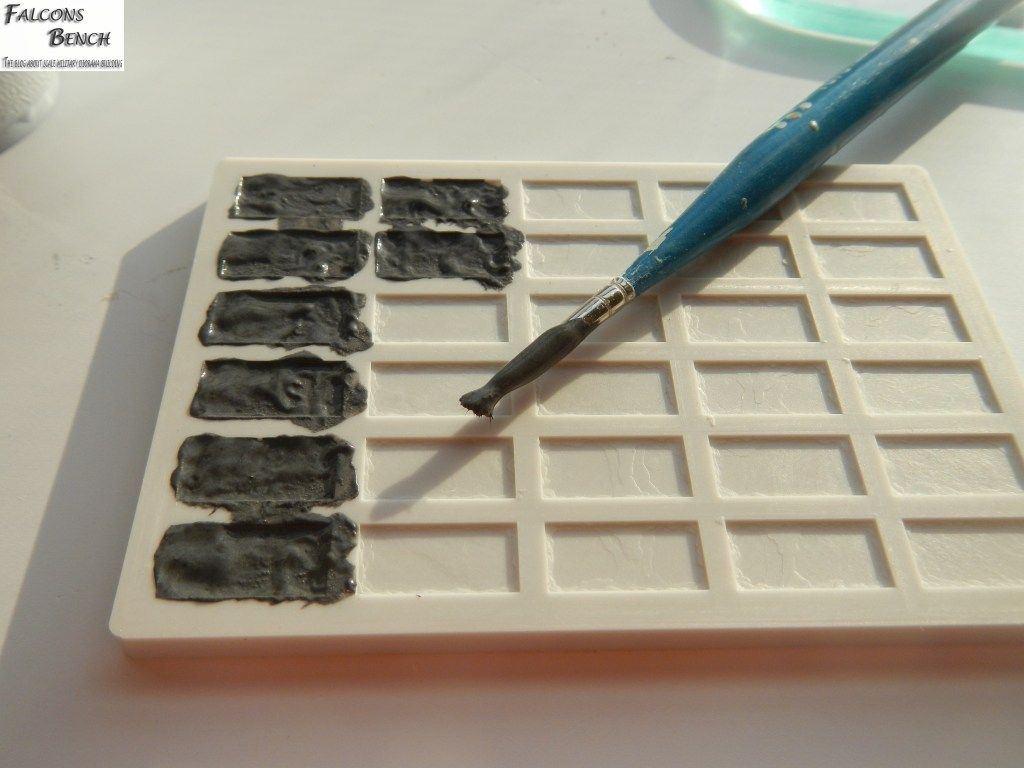
As soon as you finish with brushing the plaster into the texture, add a bit more mix to all of the tiles. This will ensure the mold cavity is completely filled.
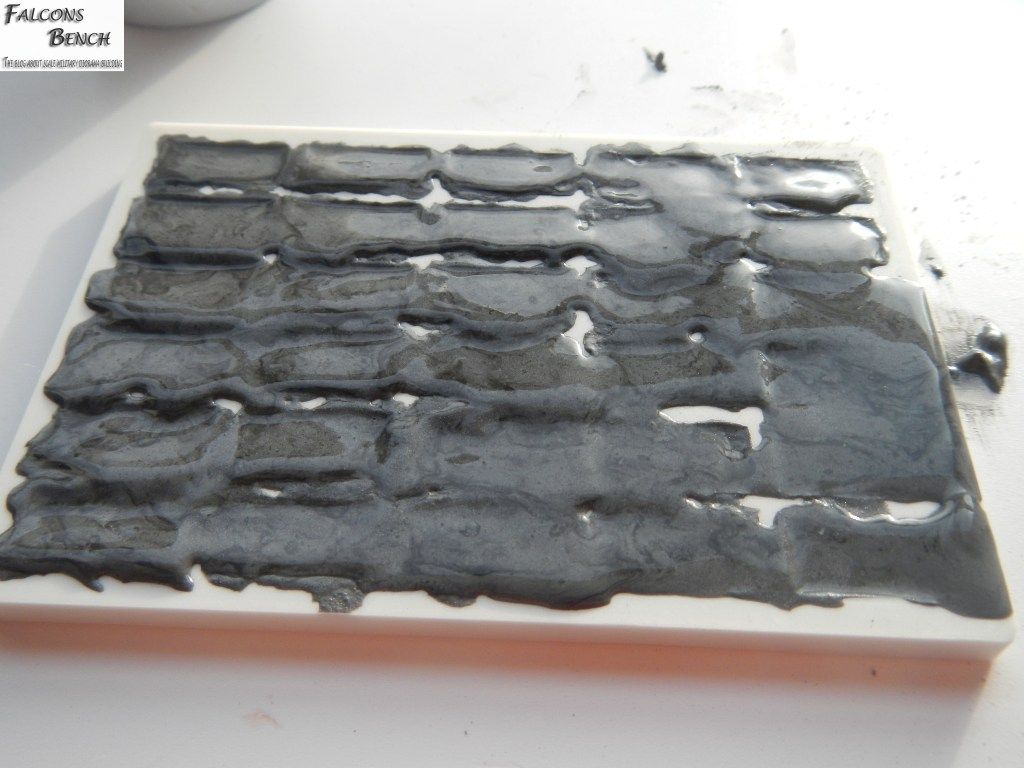
Once the cavity is filled, take a moment to tap the mold again. Then before the plaster sets up to much; take your straight edge and scrape the excess plaster away. Do not use downward pressure or you will lift out to much if not all of the plaster from the cavity.
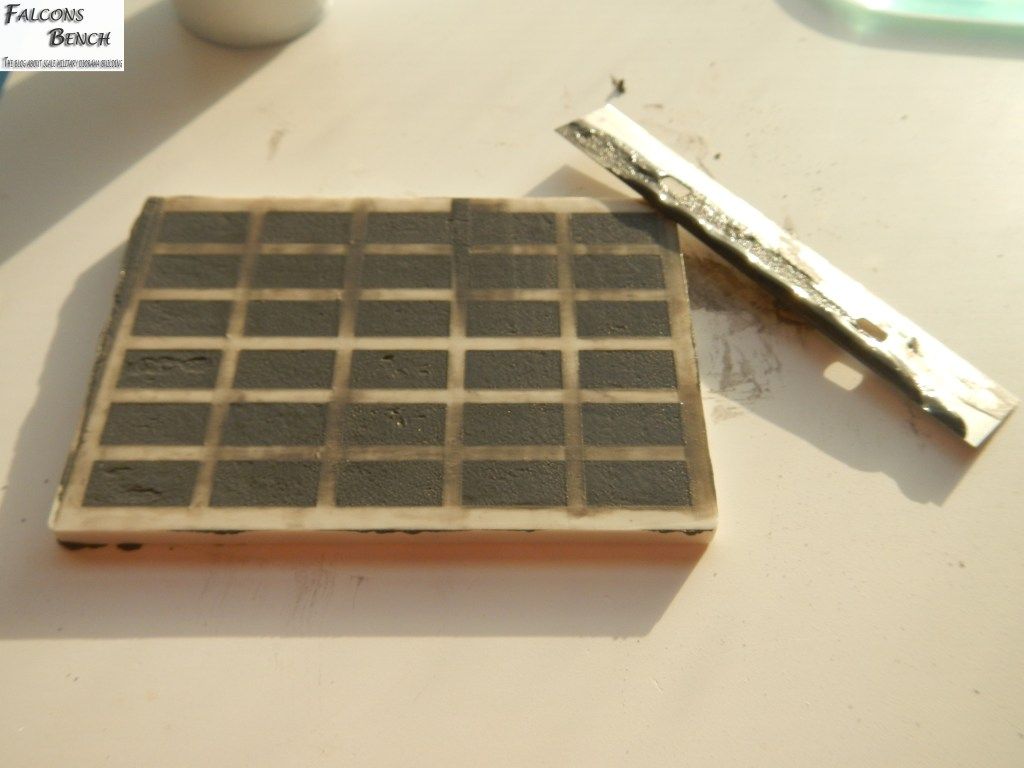
Set the mold aside on a level surface to cure for at least two hours. If you try to demold them sooner they could break as it may not be fully cured.
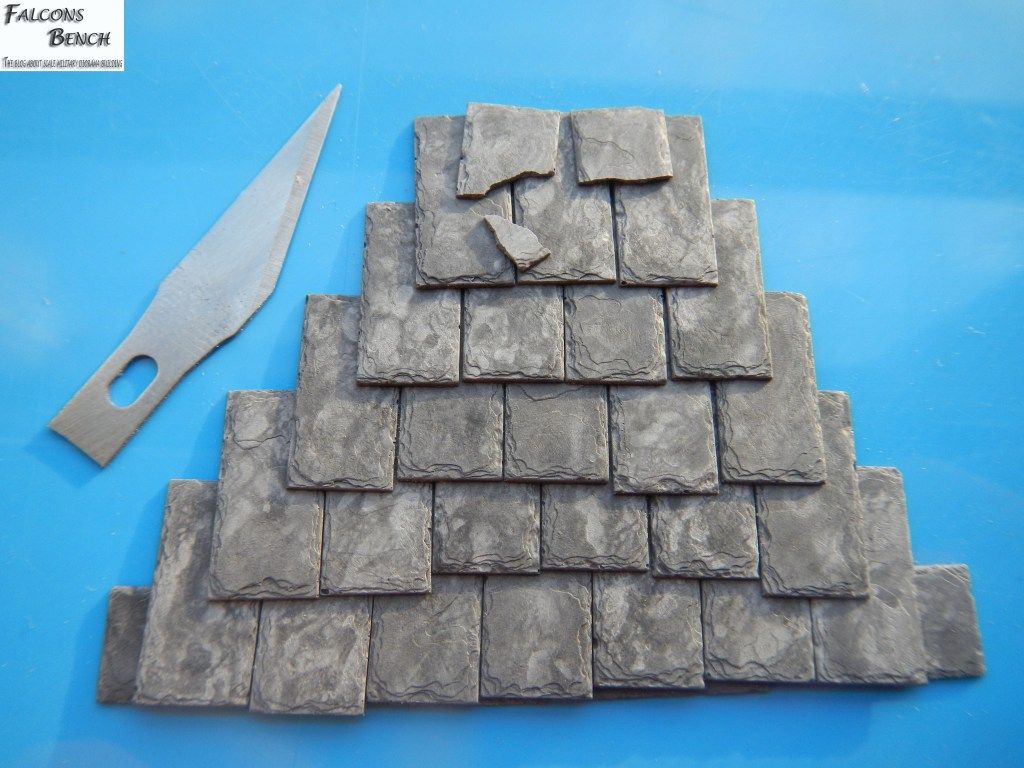
Once removed you will have extremely detailed slate tiles to attach to your buildings roof. Broken slates can be incorporated into your roof for a weather beaten and aged look.
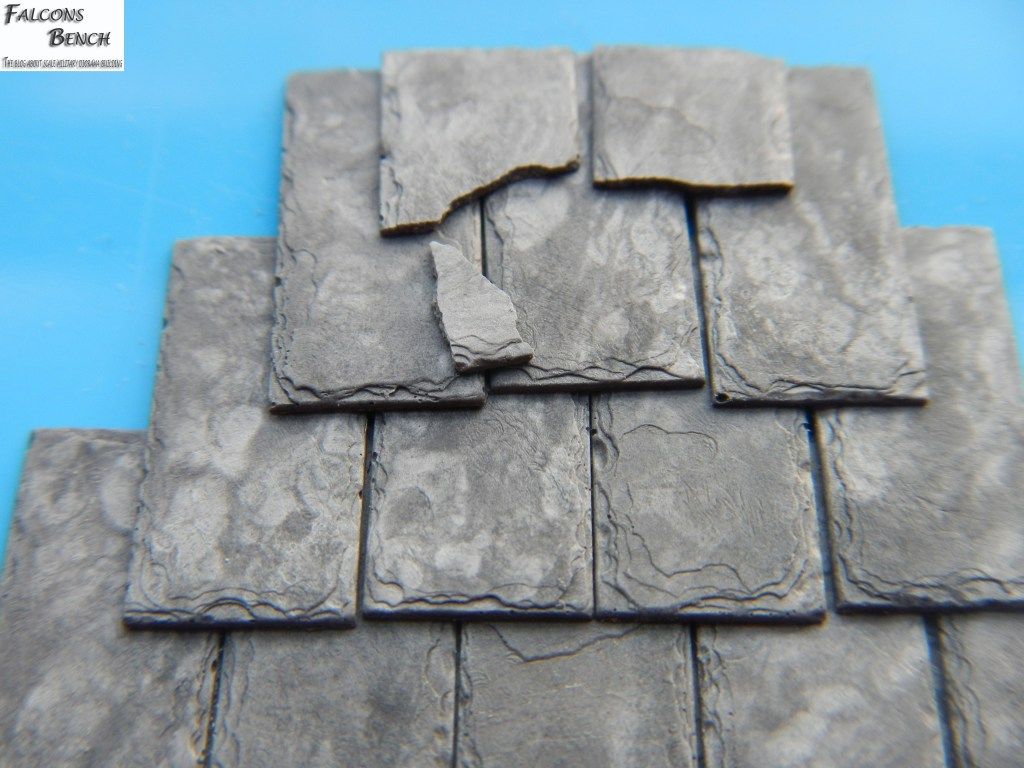
The final results of the castings:
The final verdict:
Ease of use: Very easy if you follow the instructions.
Difficulty: Moderate - but a beginner can do it!
Detail: Extremely high.
Value: The best mold your money can buy!
Check out the selection of molds, and buy yourself some today! Remember to tell them, Chris from Falcons Bench sent you!
http://www.dioramadebris.co.uk/index.asp
Thank you Joy, glad you liked the article!
ReplyDelete