
So I am working on the building for this dio now, have no idea what vehicles or figures will be in it as of yet. The design of the building came from Carlos (Blockhaus) so the credit goes to him for the design and I hope that my building skills are worthy of bearing his name on the design :-\
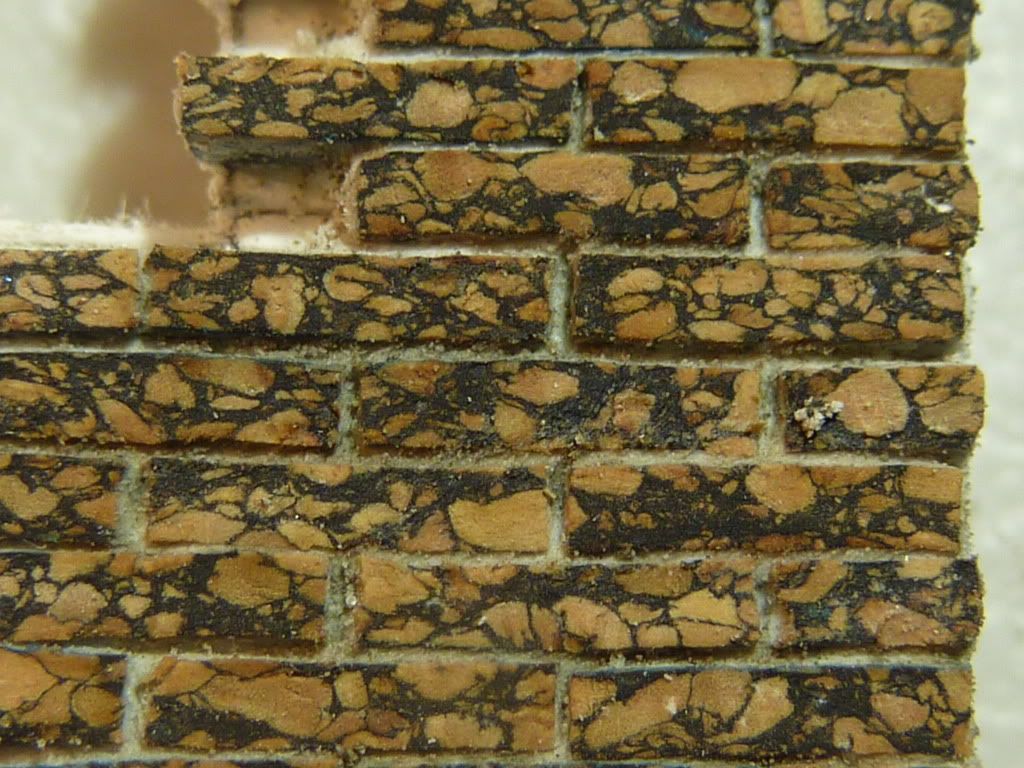
I will be building this out of 3 kinds of cork some of which came all the way from Spain to be placed on this building. Im using three kinds because they all very in thickness to give better visual interest.
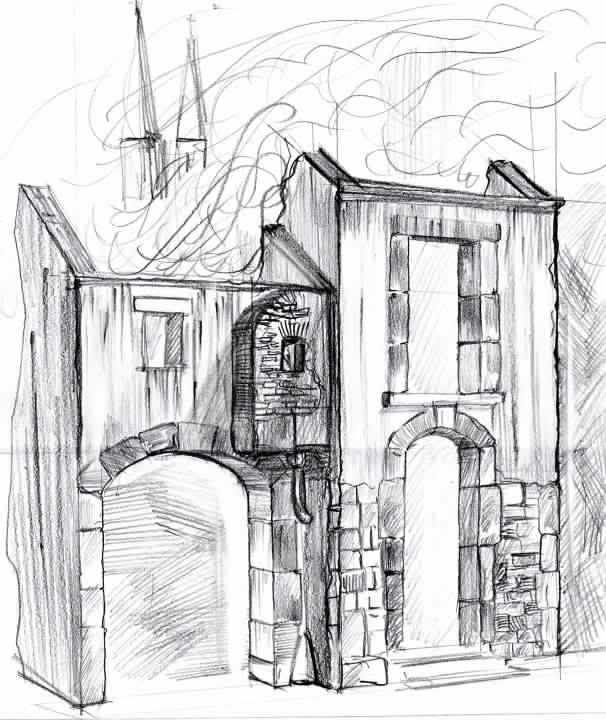
Here is the original art work drawn by Carlos:
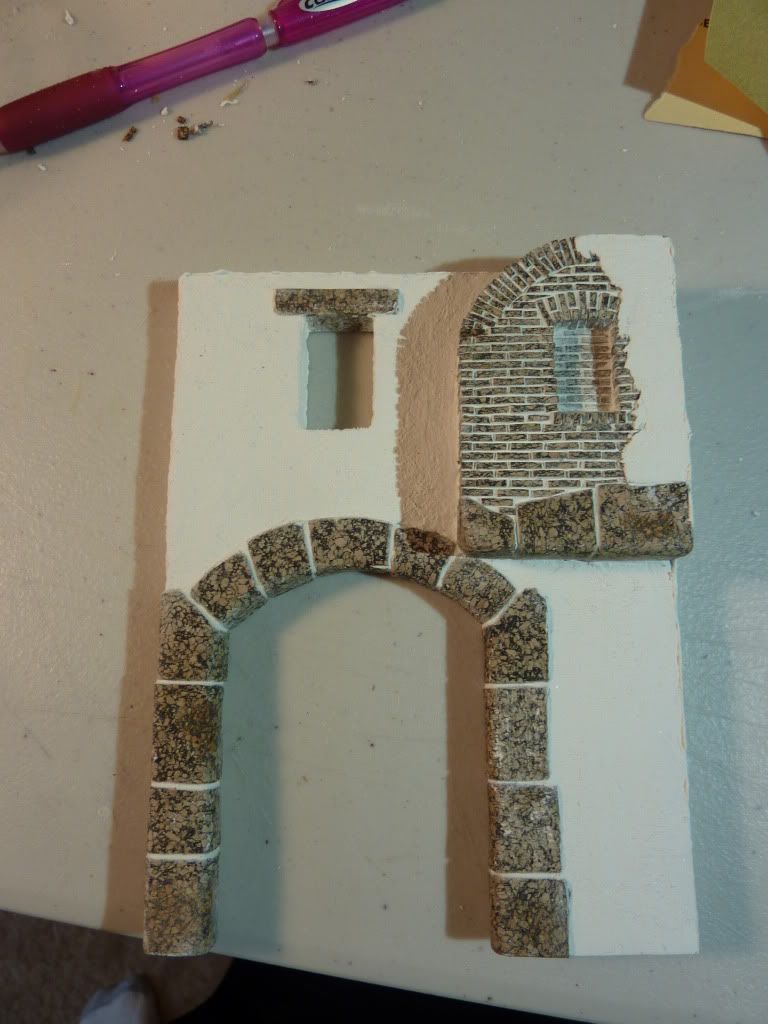
So I started cutting the foam core to the right shape and size as well as chopping endless amounts of cork for the stones and bricks. This was my first attempt at working with cork for many years and was satisfied with how this was coming out, that was until I showed Carlos and got schooled on my errors ;)
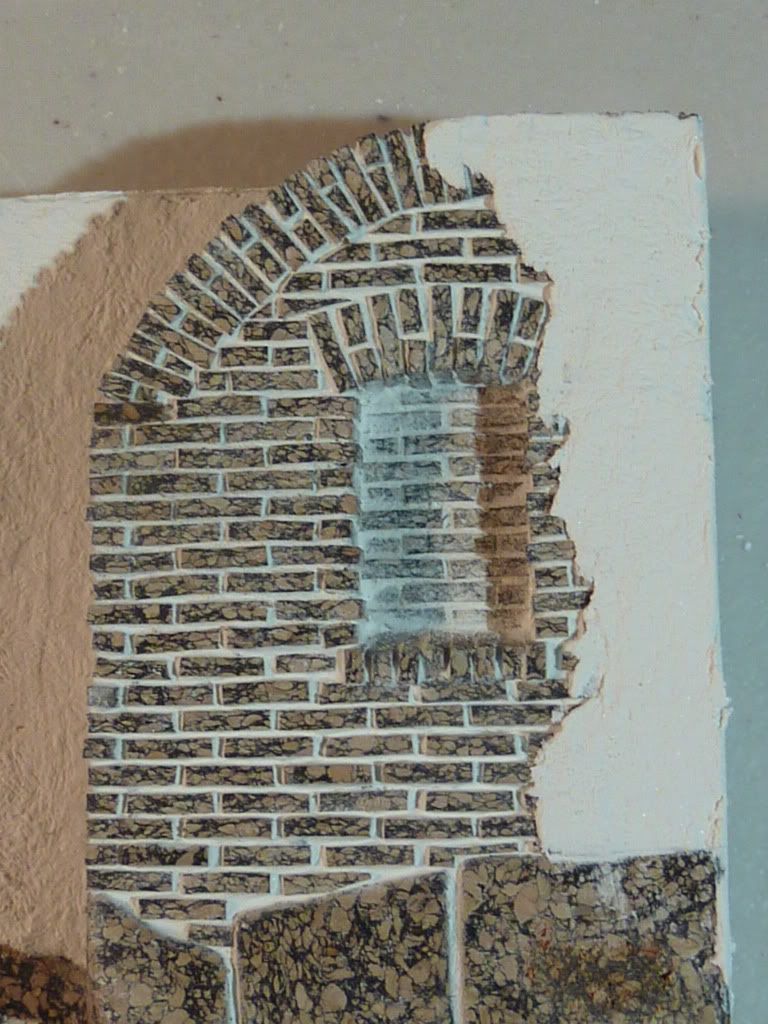
After the discussion with Carlos I decided I needed to rip off the brick section and start over, as you can see in the next photo the bricks are spaced to far apart and the joints are all uneven. This makes for an unrealistic look as no building would be constructed in this messy manner.
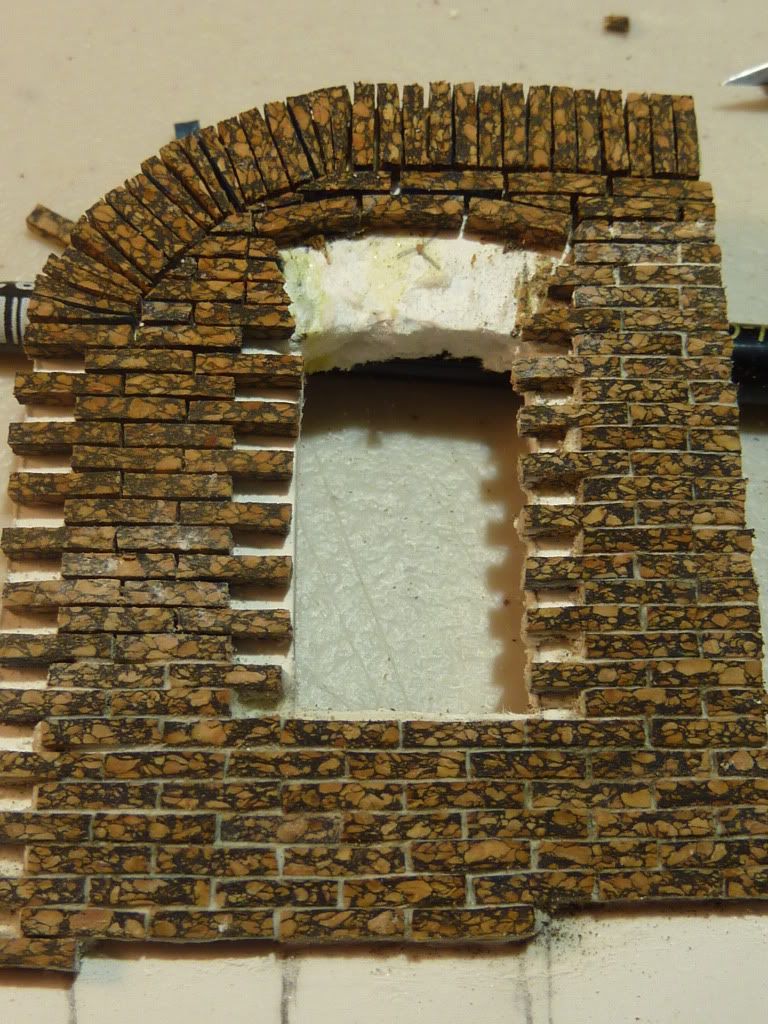
SO after spending many hours reworking the bricks I managed to come out with a much better end result thanks to the guidance of Carlos. You will see the bricks are better spaced and all are even with one another.

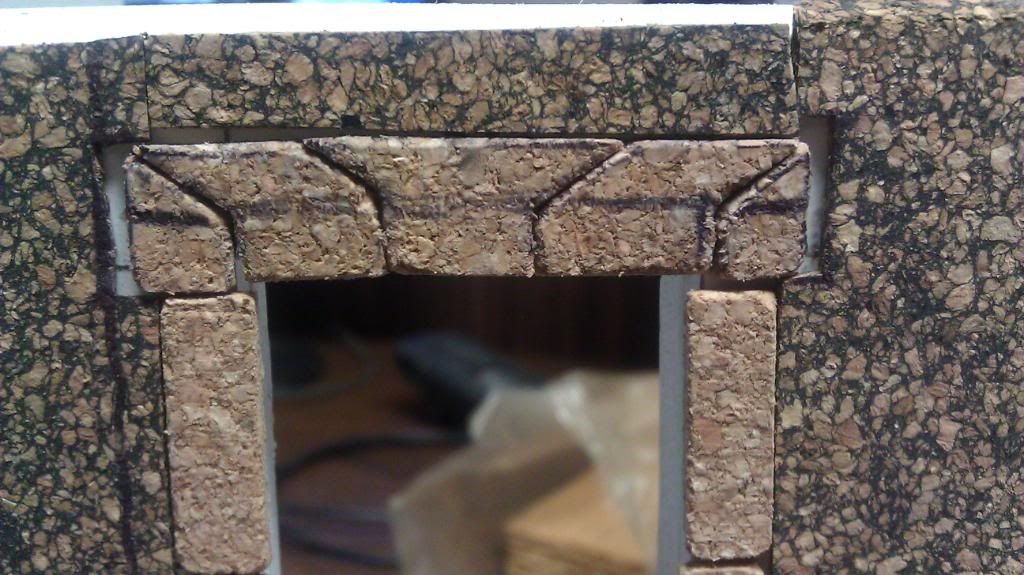
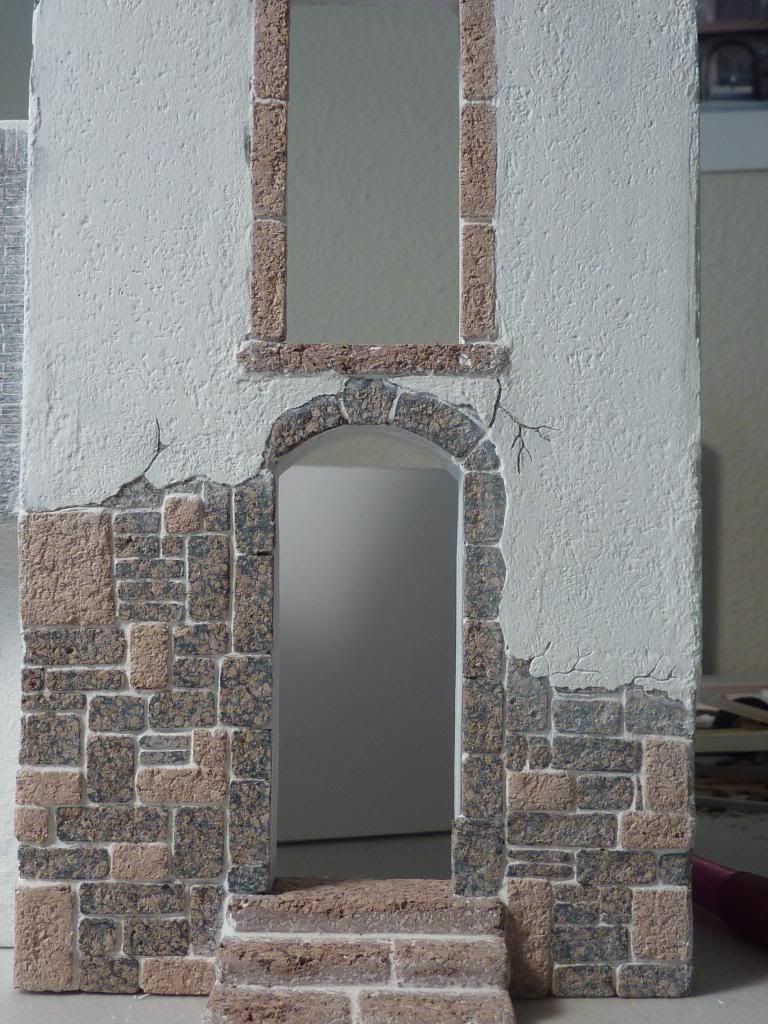
At this point it was time to make the building more 3D as well as work on the second portion of the build. Again using foam core as a sub structure I cut out the pieces needed to build up the house. I then started the work of adding the steps and stone work around the door on the ground level.
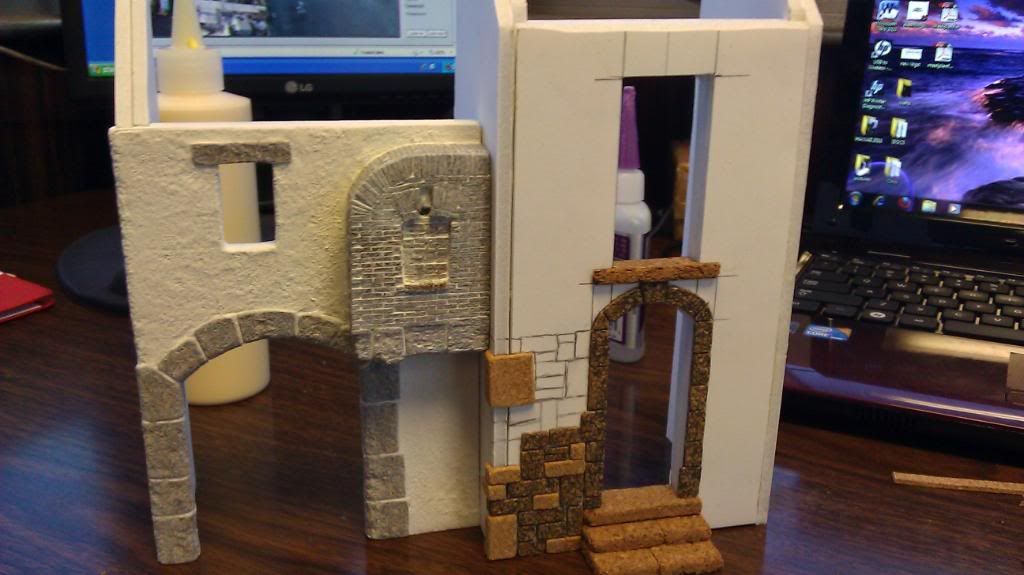
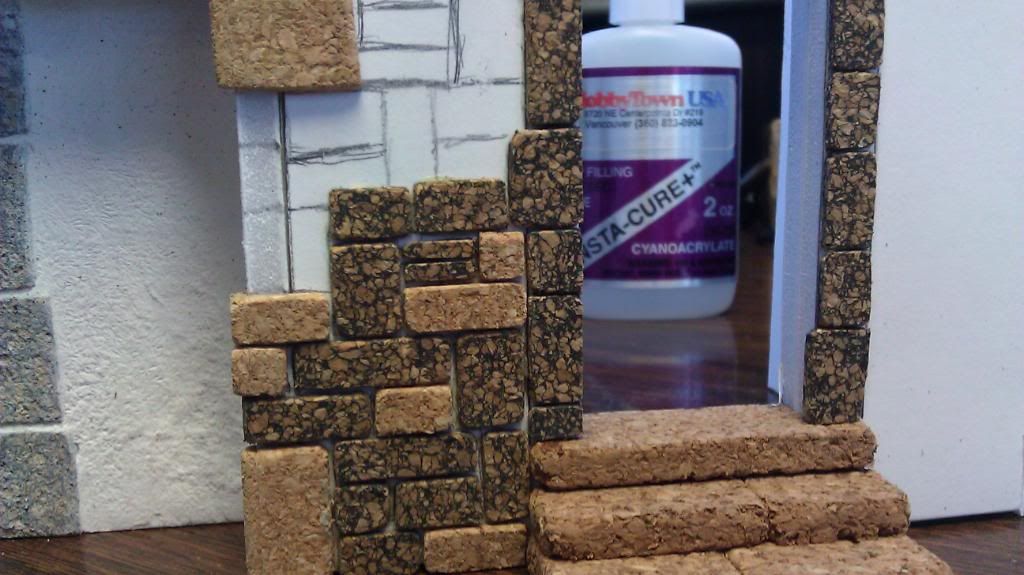
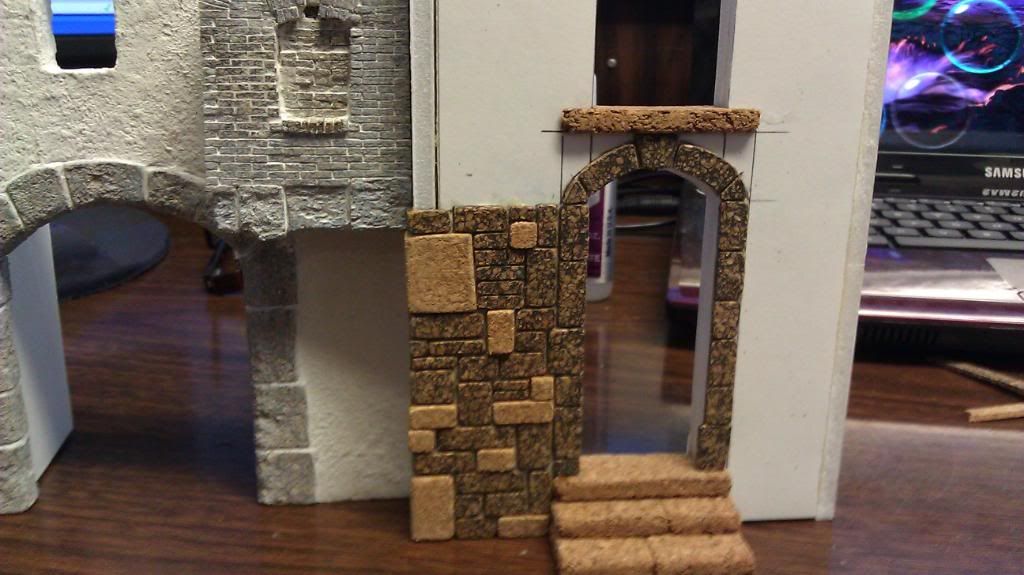
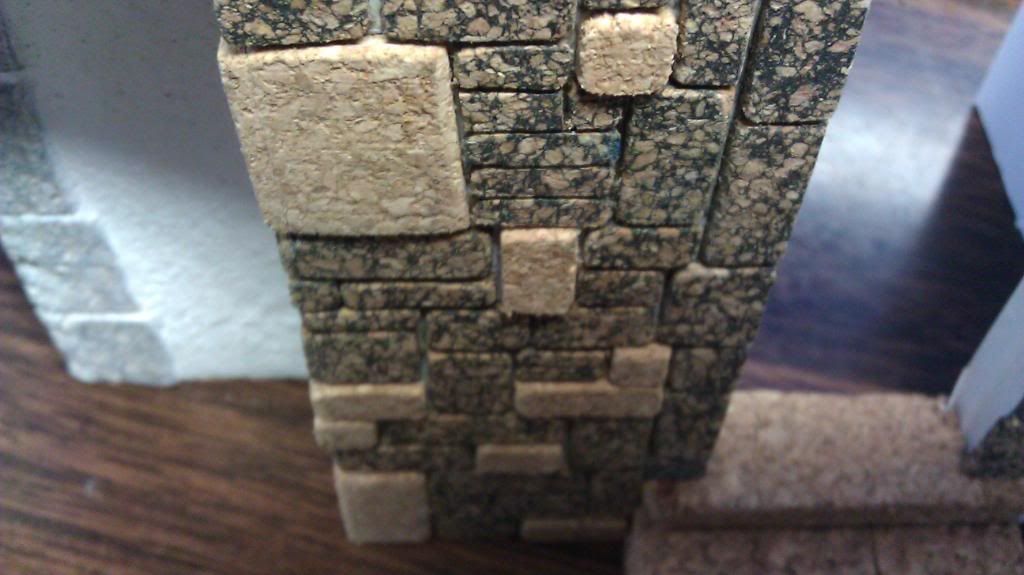
This is were having several thicknesses of cork comes in handy, it makes a more realistic look to the stone wall as some stones stick out a bit more than others.
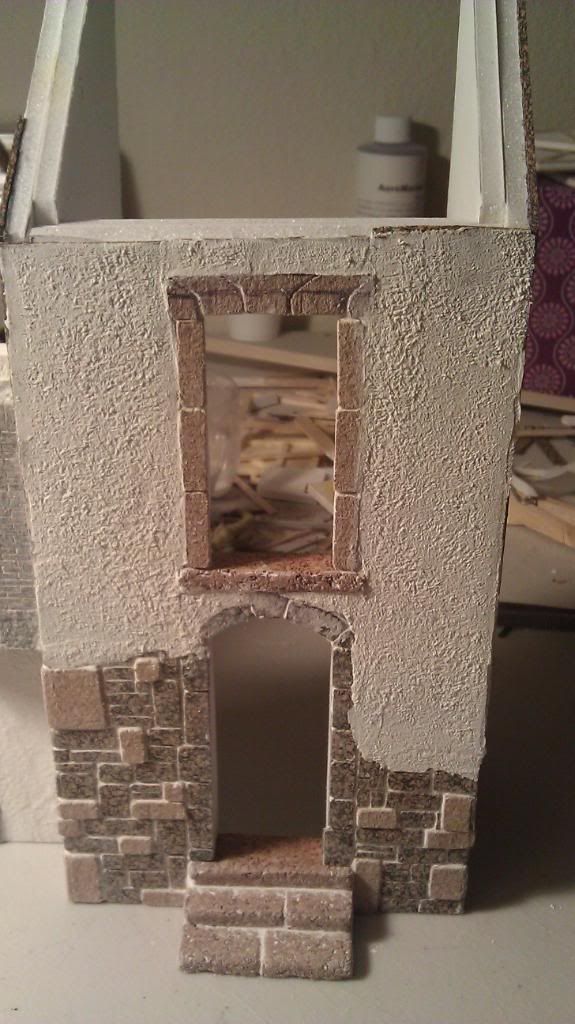
The upper level of the house is covered in a this layer of stucco, to simulate that the stucco is covering stone all the way up, I placed the thinnest cork over the foam core so that it would be the same level as the stone.

I did however add the stone surround to the upper window before adding the sheet of cork.
It was now time to fill all the seams of the stones and add the stucco to the upper level, to do this I used wall filler and a old paintbrush to apply it to the stones. once dry I used a soft toothbrush to clean the stones and remove excess filler.
Then it was time for the stucco, this was applied with a putty knife in a very very thin layer and textured with an old paintbrush.

This is all for now, more to come.
----------------------------------
01/12/12.
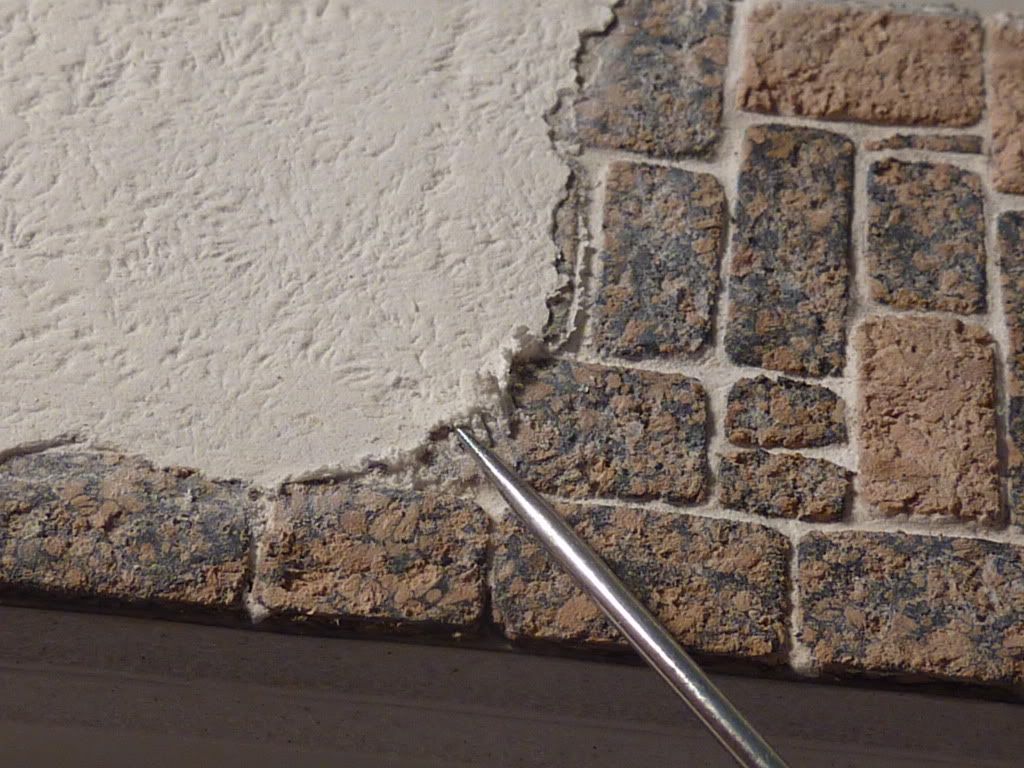
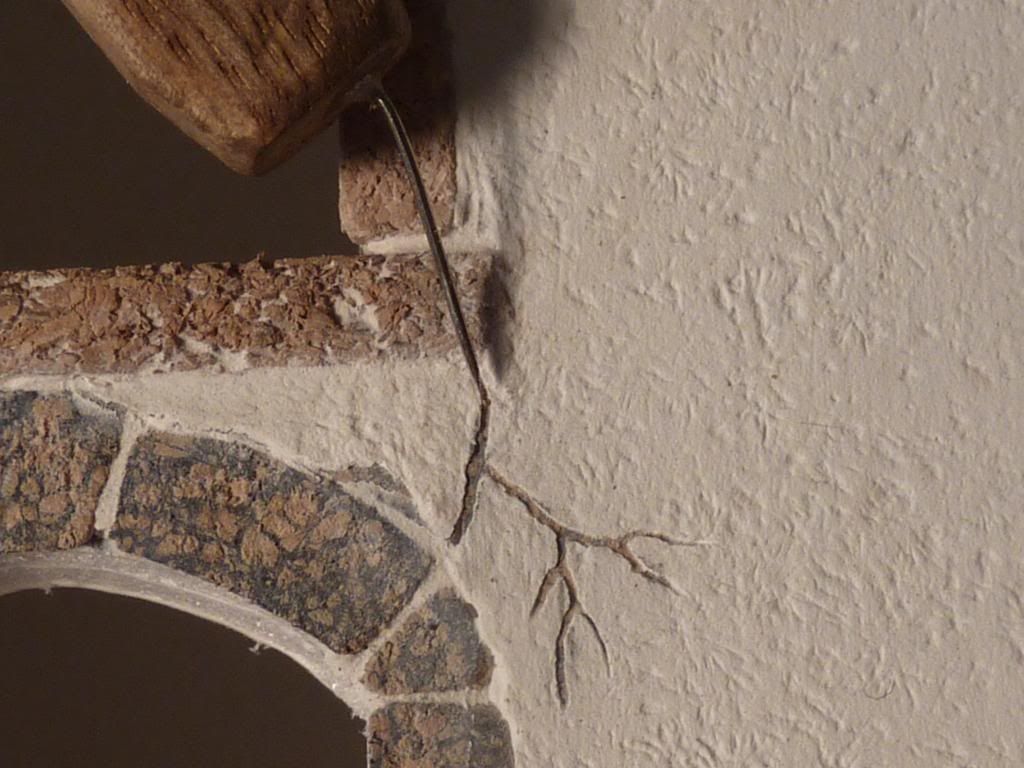
Today I have worked on applying more stucco to the sides of the building as well as working on the edges to simulate chipped stucco. While working the edges with a pin, I added cracks to help age the stucco.

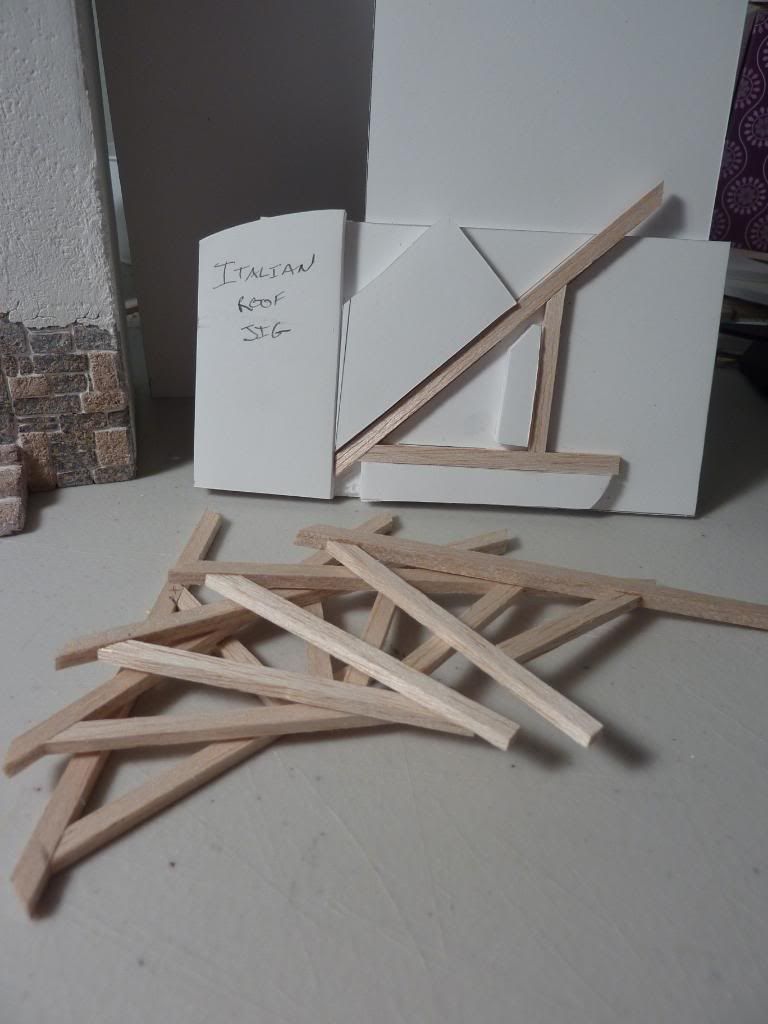
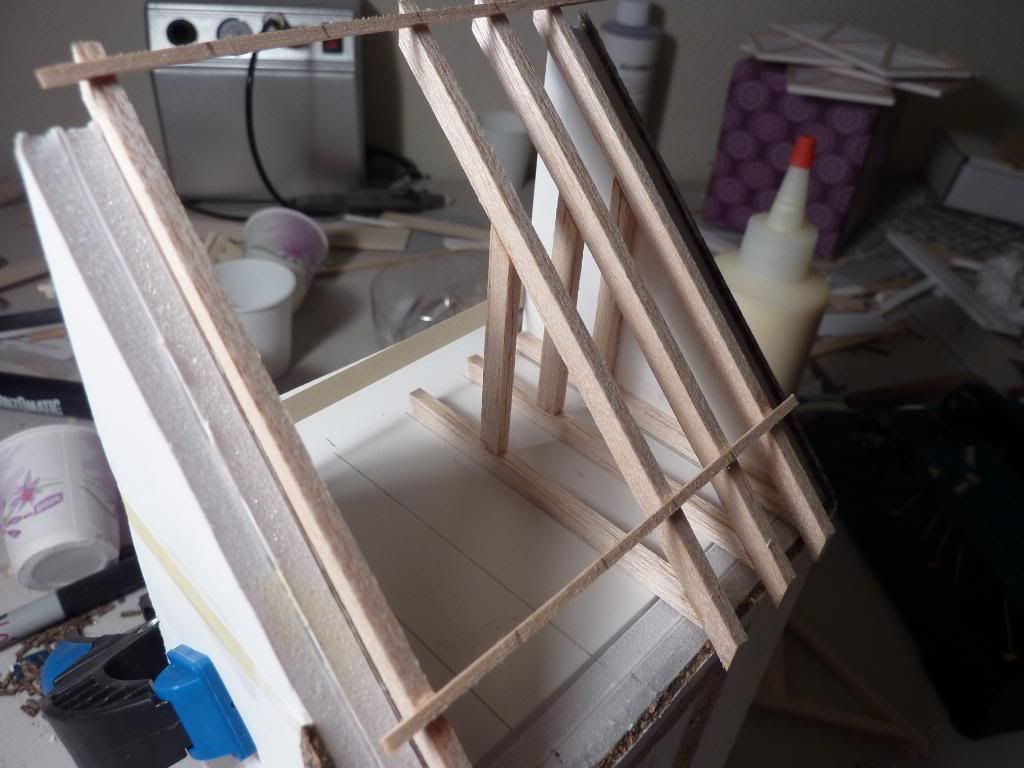
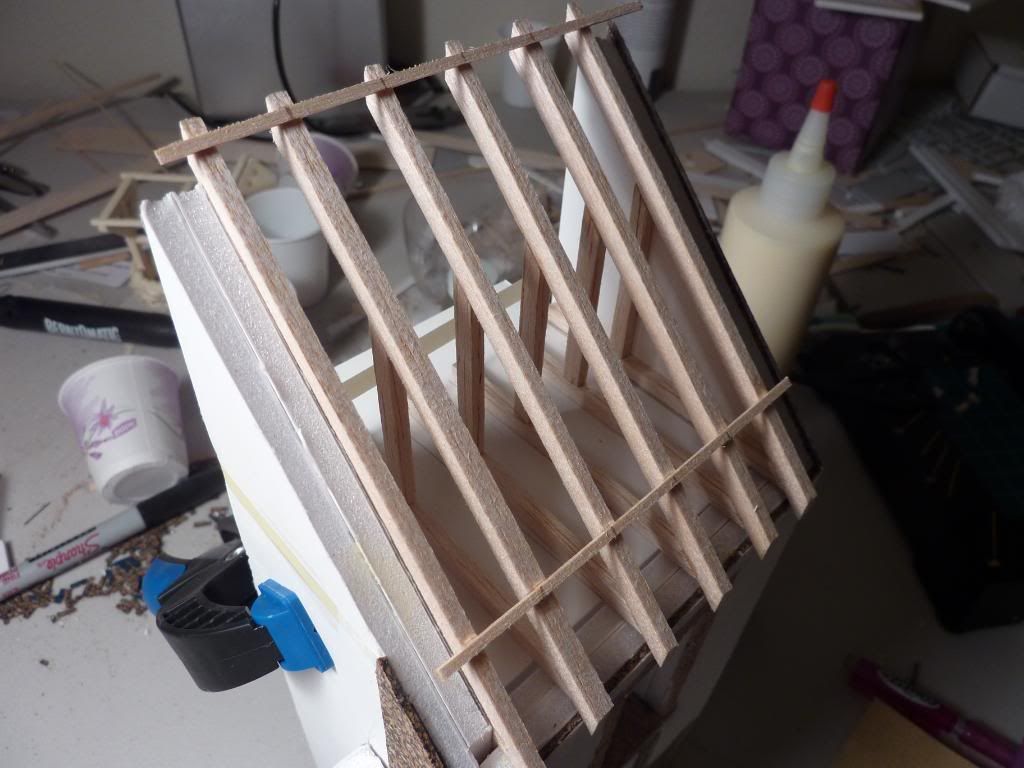
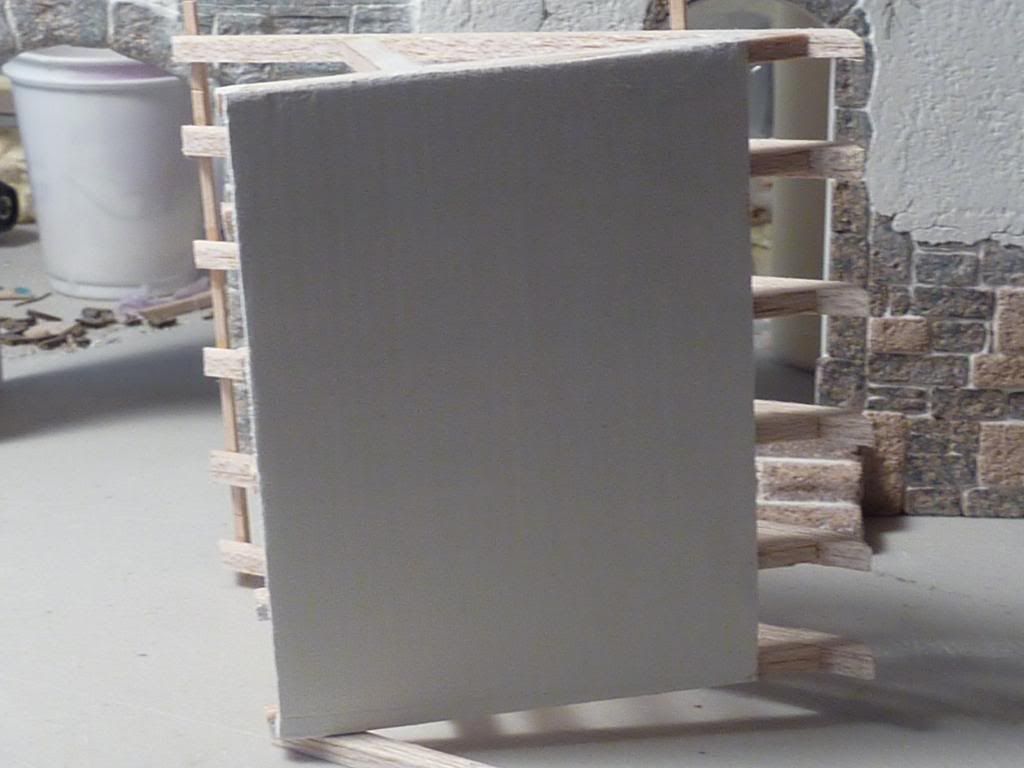
The biggest achievement for the day was the constructions of the truss system for the building. I built a "jig" to keep everything lined up and at the proper angles while the glue dries. I combined this and the use of The Chopper II, I recommend that everyone get one of these as they are indispensable in our hobby!With this combo I was able to knock out all of the trusses quickly and accurately.


Once the trusses were complete I installed a temporary brace to help hold up the trusses to get them all lined up. I set the two end trusses with a drop of glue to help keep them still as I add trusses. After the end trusses were set, I glued two horizontal runners at the top and lower area of the trusses. I used this to mark out the trusses to a scale two feet on center.
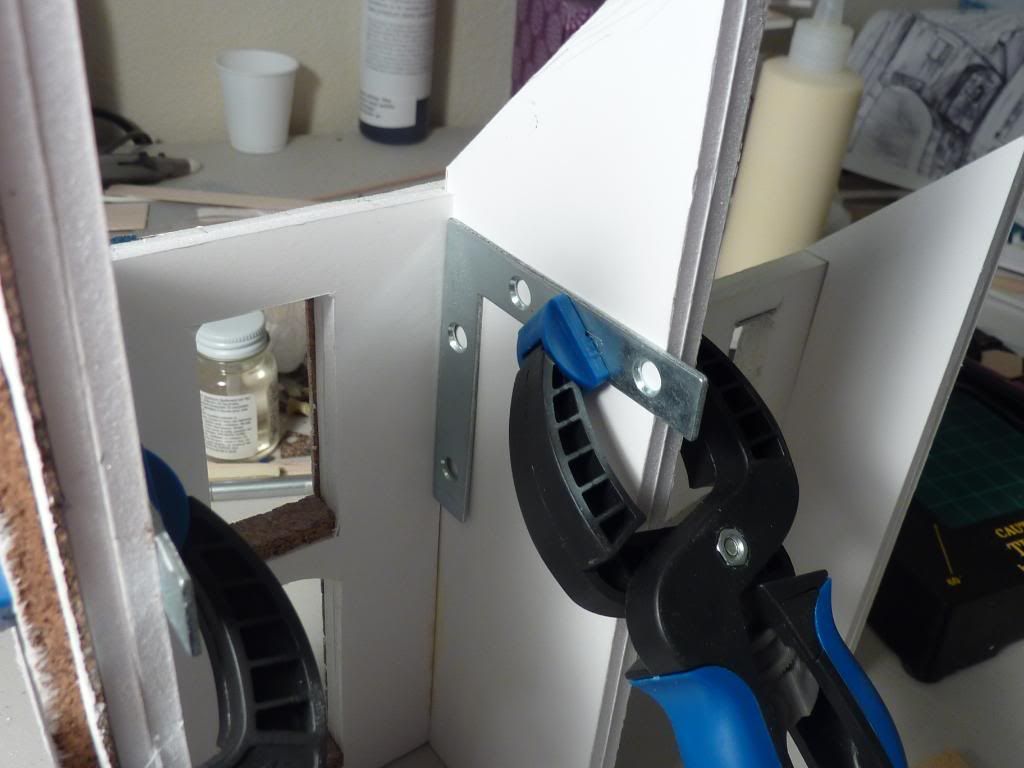
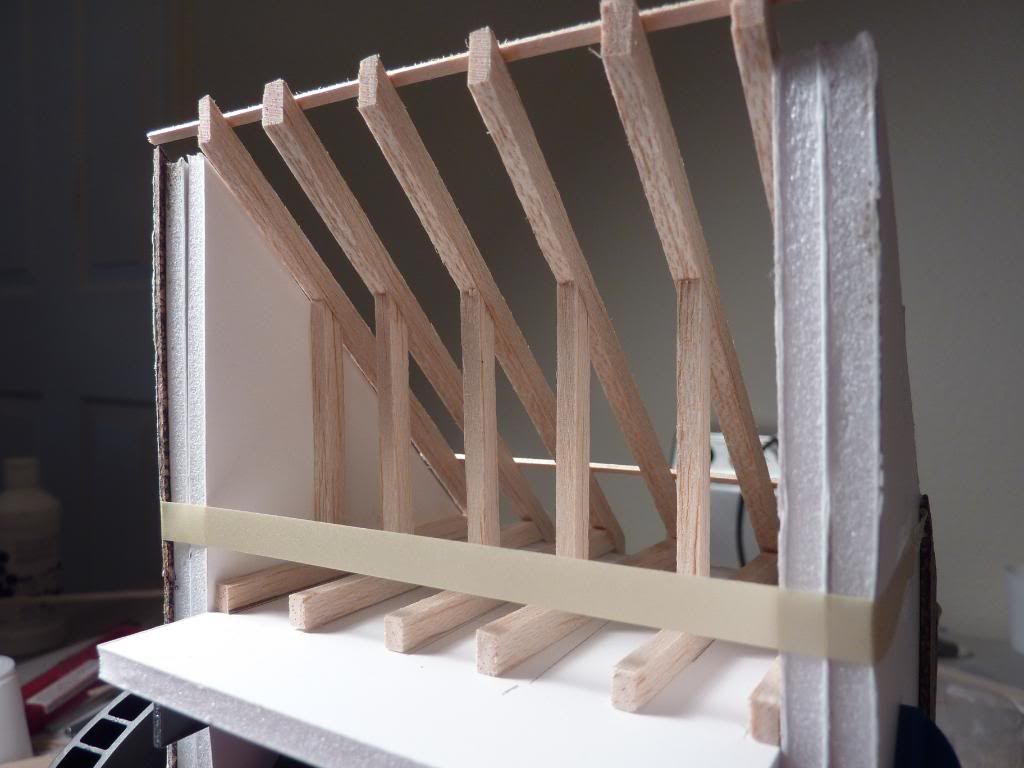
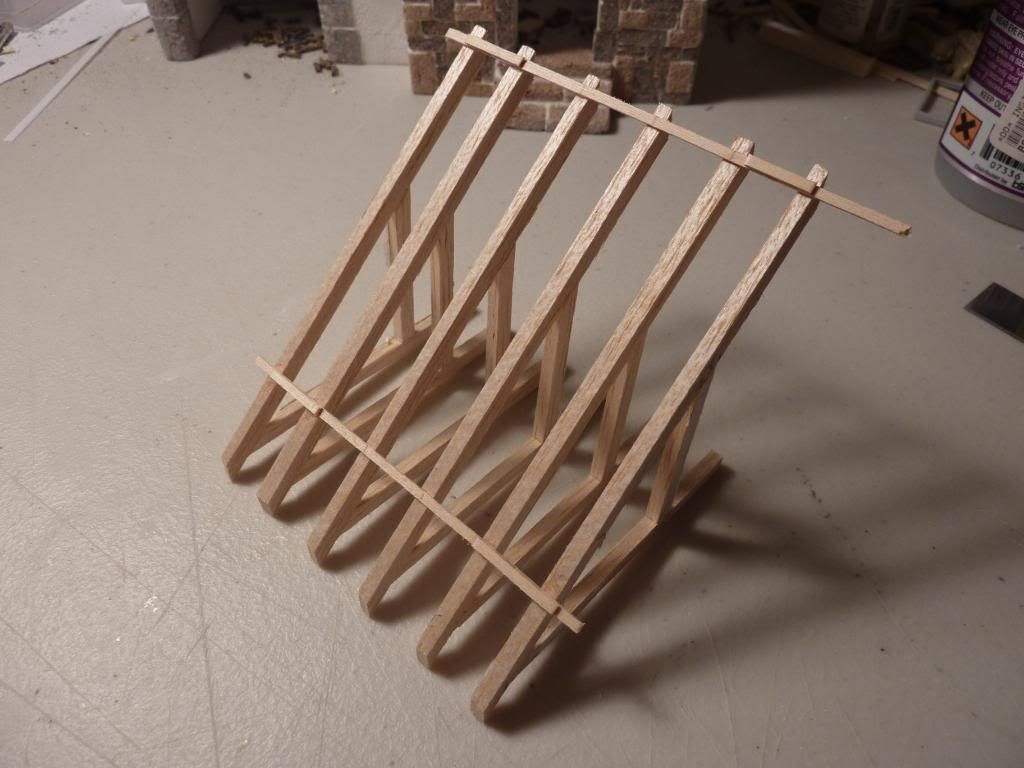
Now I popped the glue spots on the two end trusses and the whole assembly slides out. This will make detailing the ceiling easy to do without trying to reach into the confined space of the building. Next will be to add the lathe and plaster to the ceiling and reattach the whole assembly back onto the building to get it ready for the roof tiles.
------------------------
01/14/12
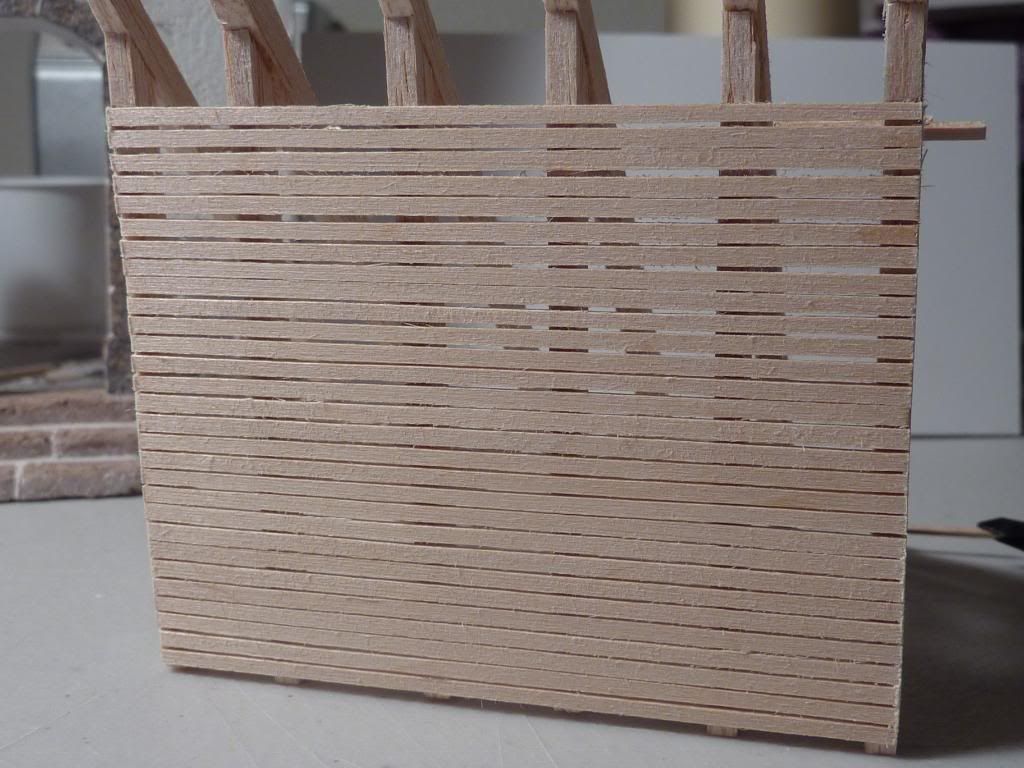
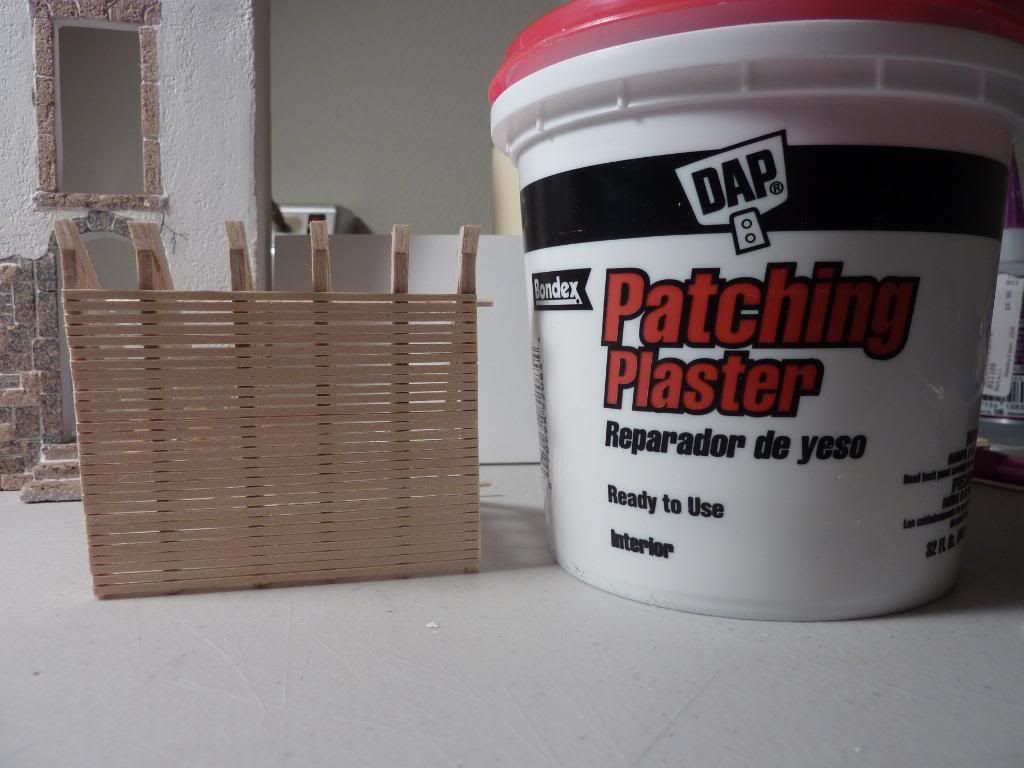
OK so did a little bit of work on the ceiling, I have added the lathe and plaster to the trusses. As you can see this process is very realistic because it is exactly how it is done in real life. The lath is place on the trusses first followed by the plaster that is pushed up into the gaps in the lathe. This creates "keys" that wrap the plaster around the edges of the lathe to lock it in and secure the plaster to the ceiling.
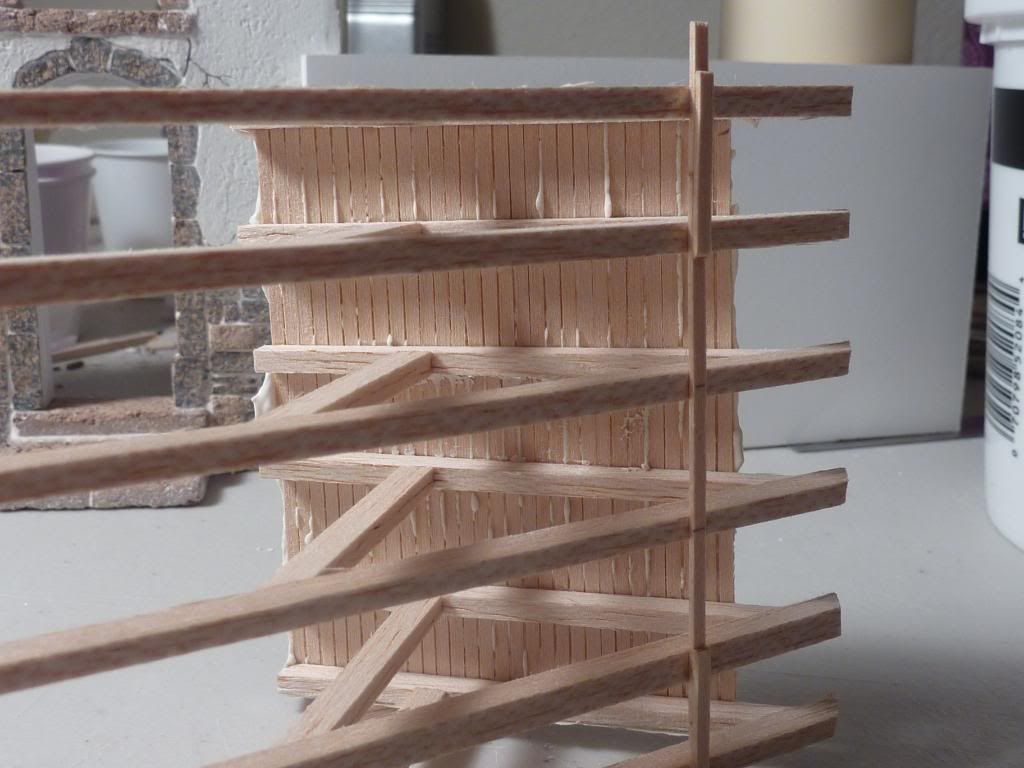
I have done the same thing here, only in scale. But as the photos will show, it creates a very realistic look to the attic area as you can see the plaster "keys" holding the ceiling up.
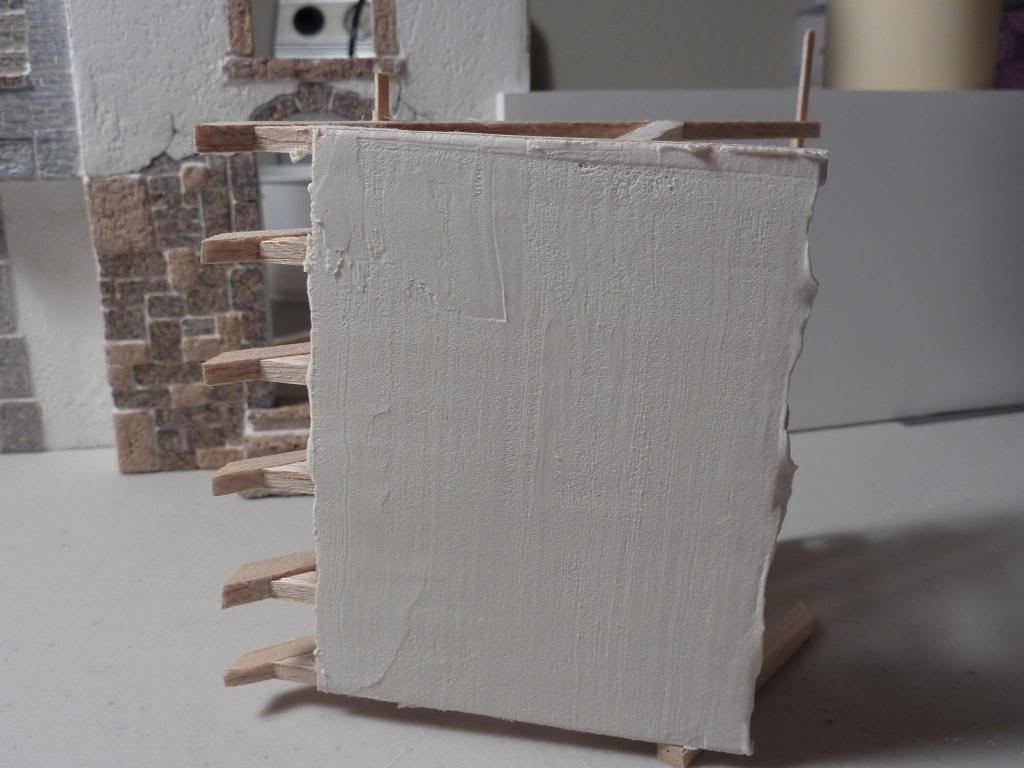
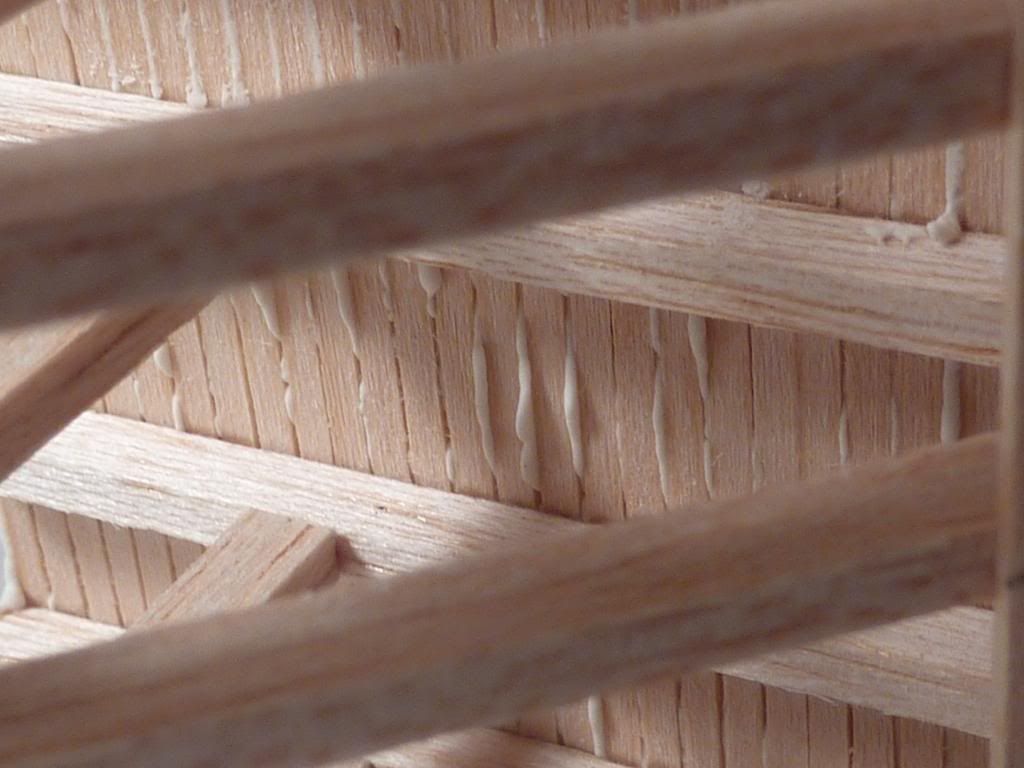
And final result after smoothing the ceiling plaster:
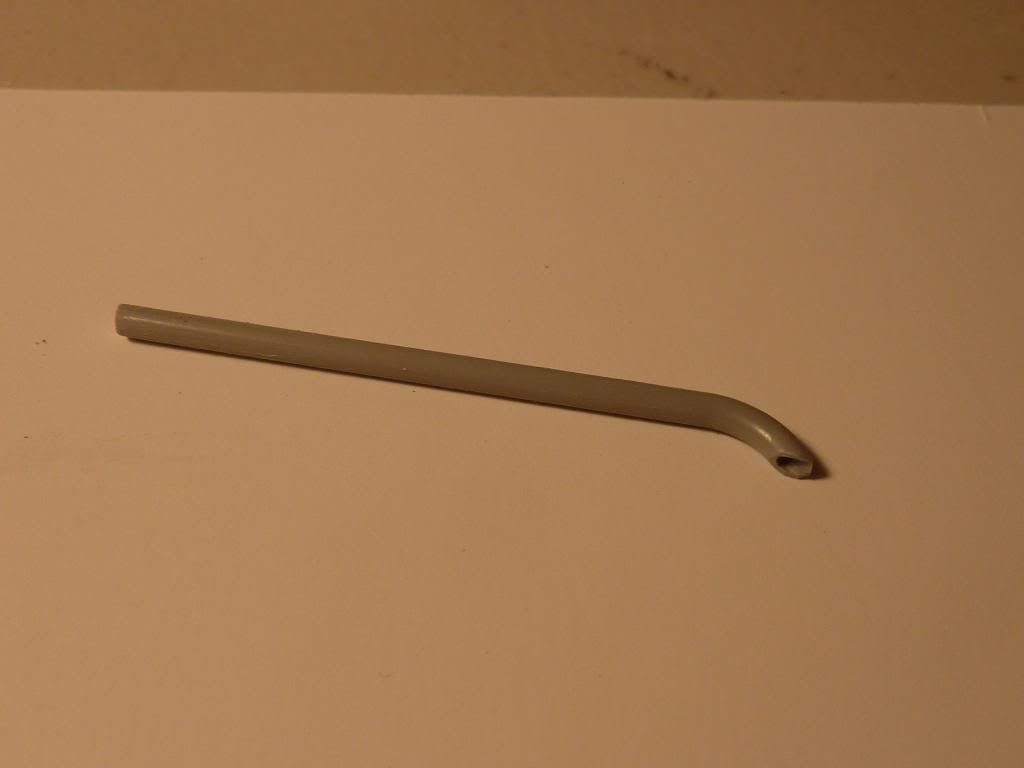
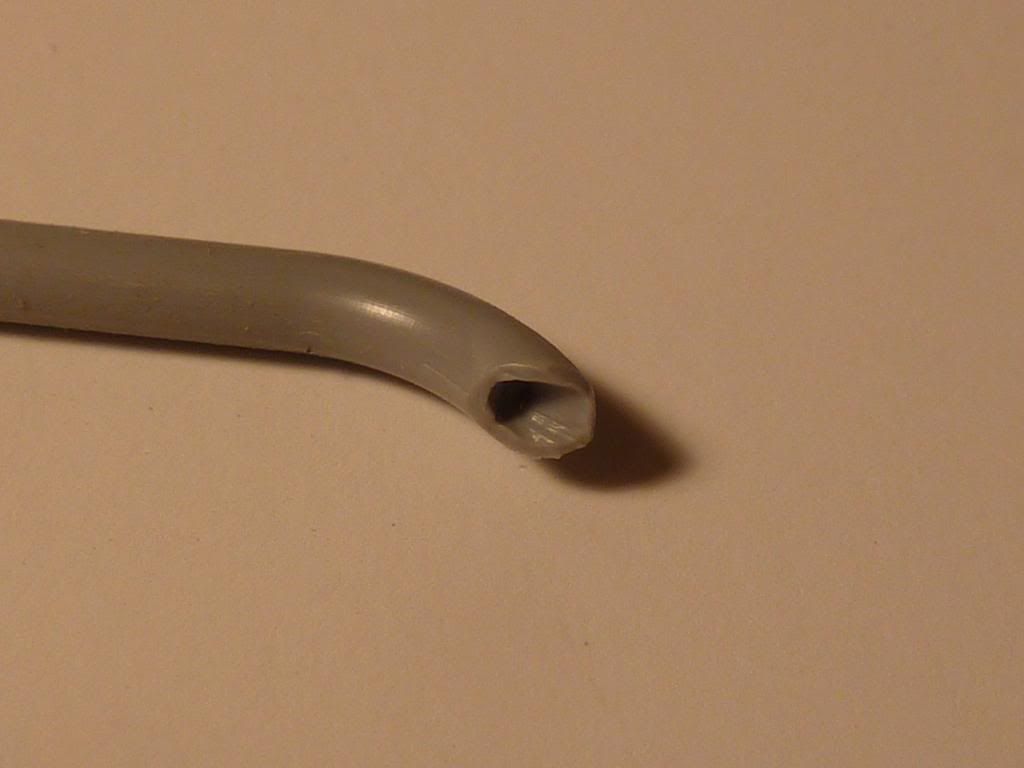
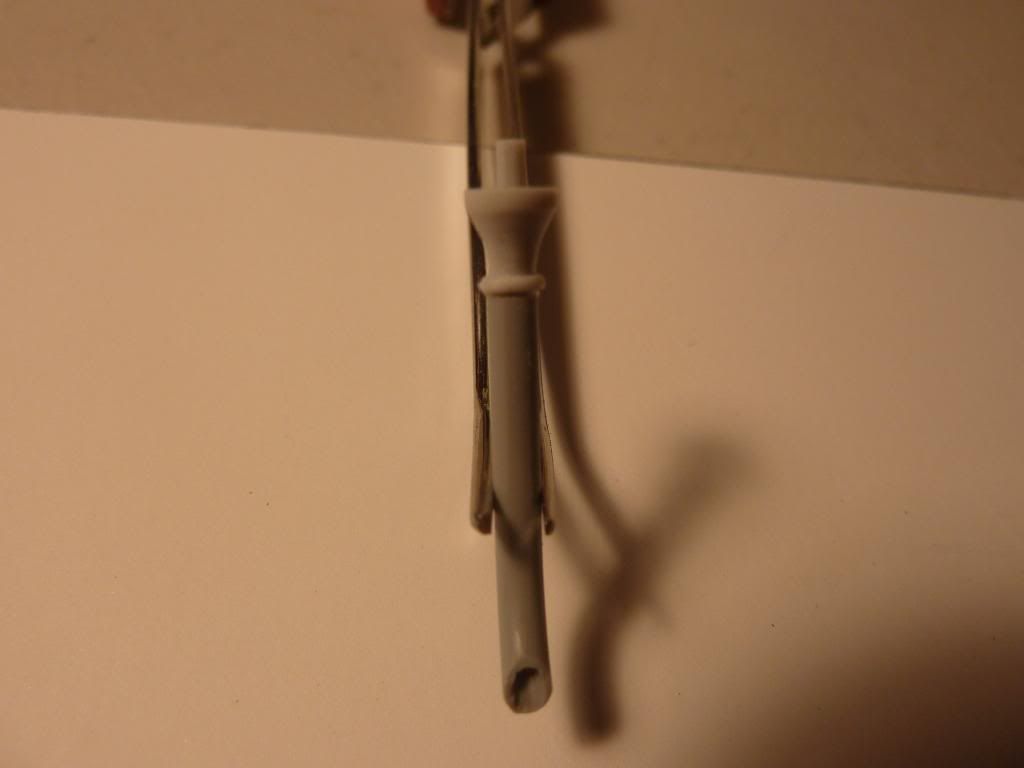
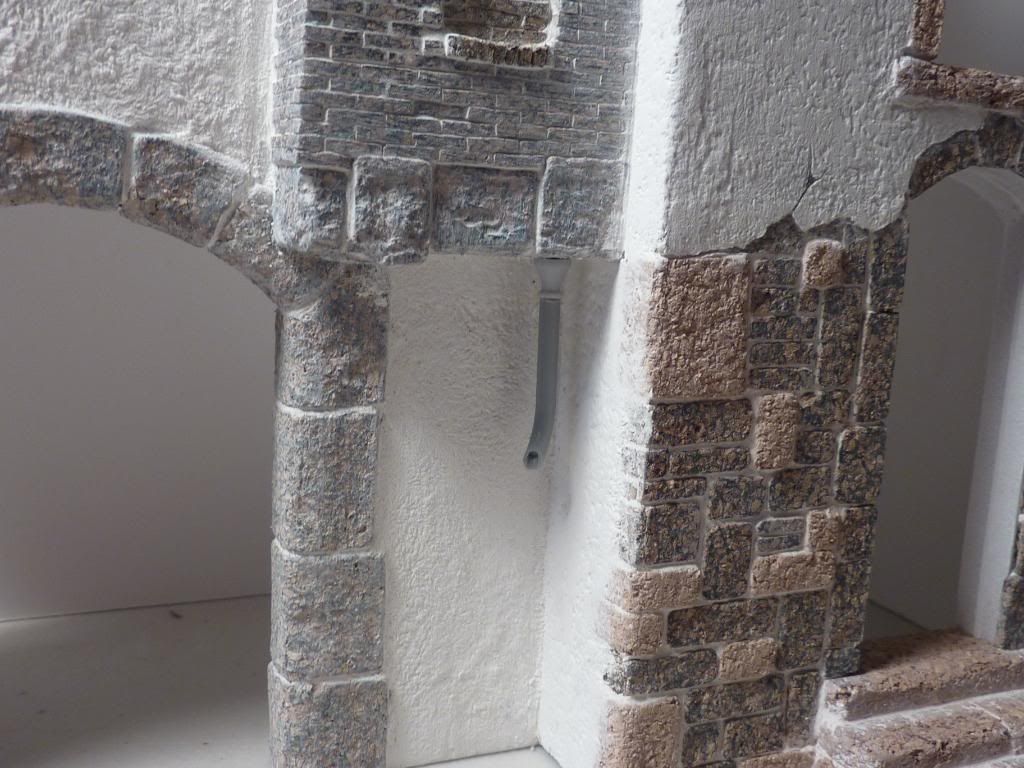
While the plaster is drying I have decided to start work on the down spout that will sit under the brick bump out of the building. The drainage system for this section of gutter goes through the top of the brick bump out, and out the bottom. To simulate this I am going to be using a section of sprue from a model kit and a salvaged piece from the Mini Art street lamp set. Using a drill bit and a number 11 blade, I hollowed out the end of the sprue to simulate the pipe. I smoothed it out the best I could using the #11 blade and then followed that with liquid model glues to "melt" away any jagged edges. I then attached the sprue to the Mini Art lamp section using CA glue and a tooth pick as a pin to hold it secure.
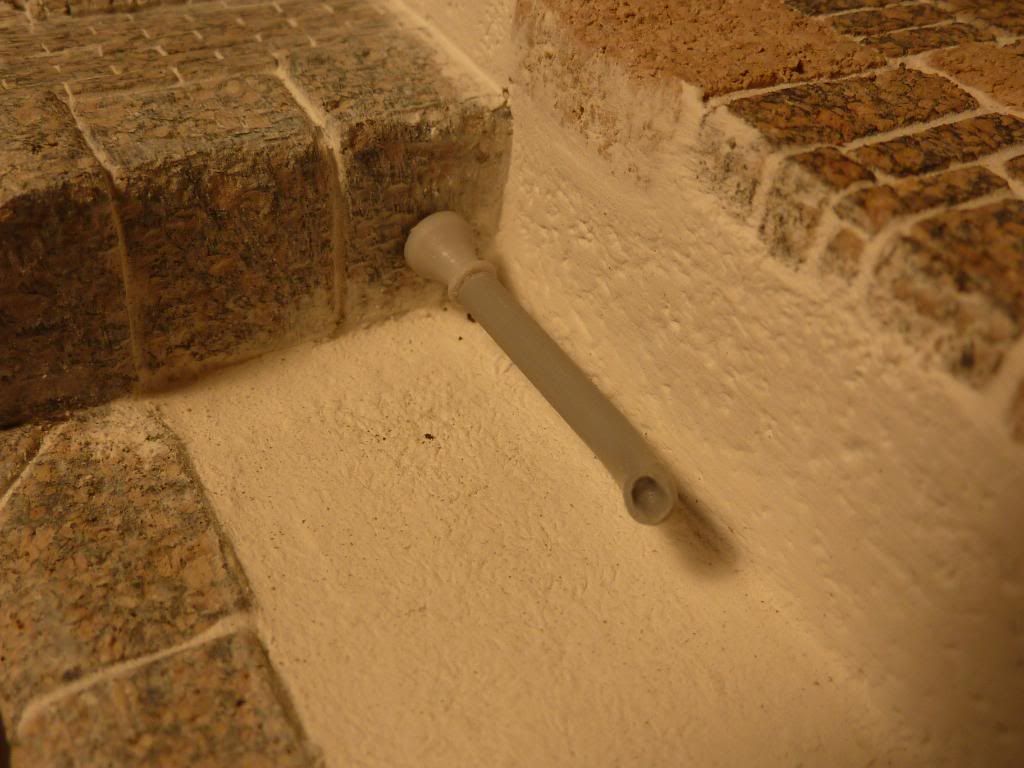
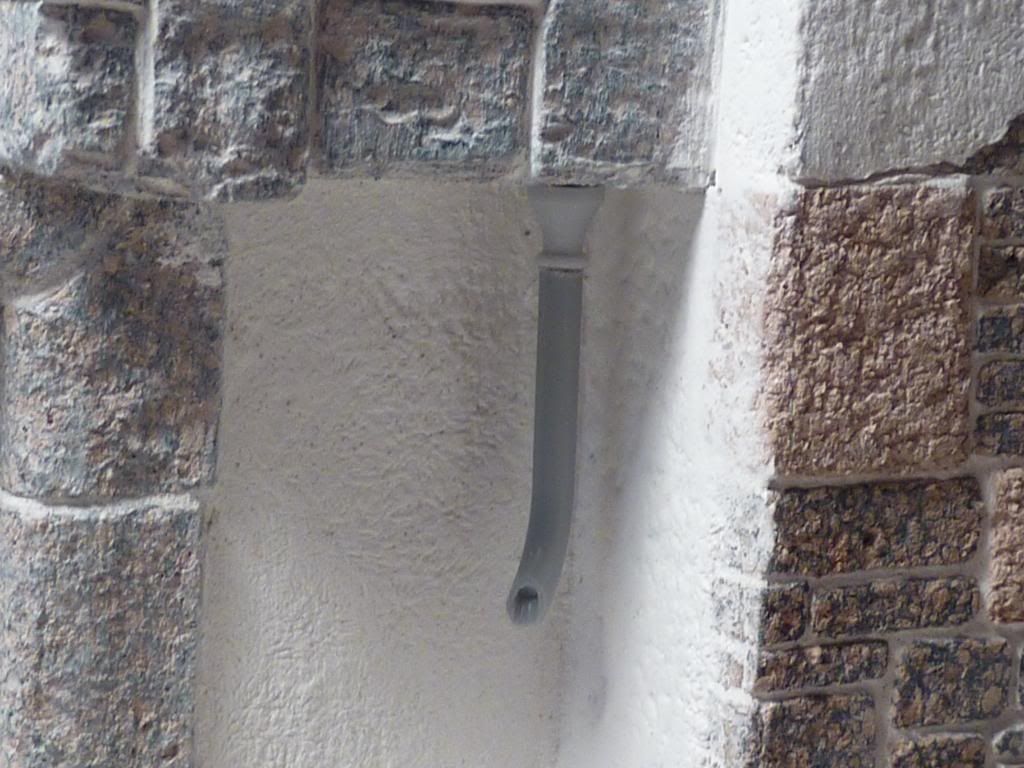
To attach it the the building, I drilled a small hole into the cork and will secure it with CA glue once the model is painted. If done before painting it would just be in the way.

No comments:
Post a Comment